
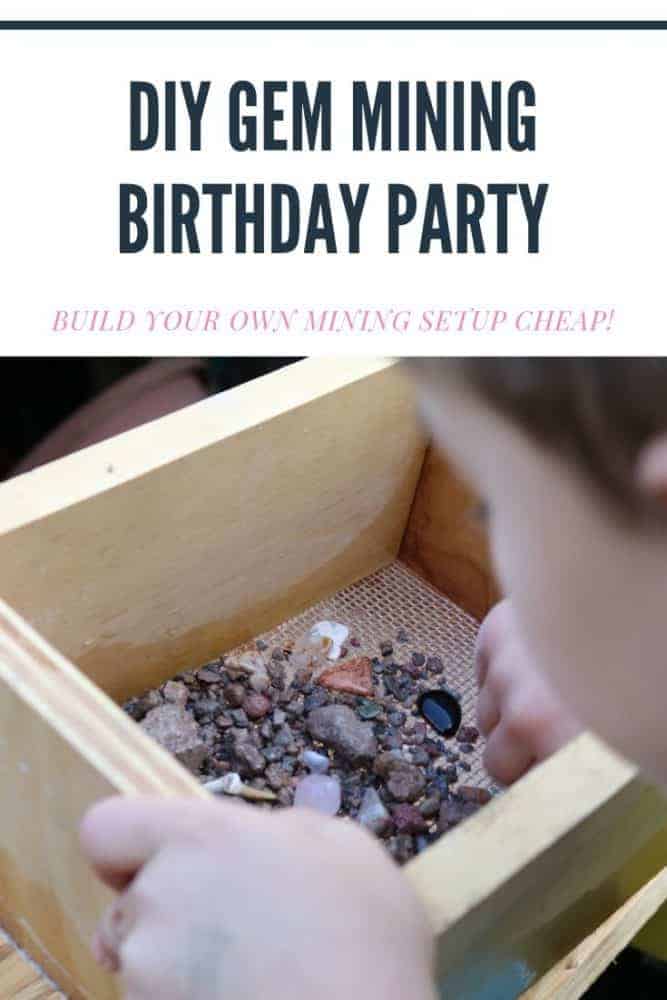
How to build a mining setup for a kid’s birthday party. A mining sluice is expensive to rent, but this setup used mostly scrap wood and was a perfect addition to our party. And it’s mobile.
My sons are really into a few things: Minecraft, gems and rocks, and bats (the animal, not baseball). We combine their birthday party so we can “go big” and so this year we decided to do a Minecraft birthday party with a mining setup. The two seemed to go together pretty well.
Now… I’m not a party blogger. In fact, I’m pretty terrible at decorating in general. It is not my jam (although my kids’ Minecraft bedroom is pretty neat). It took me several (5?) hours of cussing and trying to roll out fondant for a very simple Minecraft cake. It was so bad. I really thought the cake videos I watched on Facebook would help me be the next cake pro, but… alas… they did not.
What I’m good at though is ideas and fun stuff for the kids. And my husband is good at helping me create those ideas when it involves woodworking… which I’m not quite as good at as sewing. I’m going to get into some step by step instructions for the DIY mobile mining sluice that we setup for the party, but here’s a quick YouTube video to show it in action and to give you an idea of how it was structured.
Supplies
- Scrap wood (or buy some, whatever)… we dug into our wood pile which has grown out of control
- Wood glue that’s waterproof so you can seal the edges where you put the wood together.
- Polyurethane: You need 2-3 coats of this to protect the wood
- Redi-Roll Hardware Cloth, 1/8″ x 36″ x 10′ (we didn’t need this much but it was hard to find the right size in a smaller quantity- that was reasonably priced- so we just got this)
- Heavy duty stapler
- Something to circulate the water. We used our pool filter/pump. Cycling the water was a more ecofriendly alternative to just using a hose. This particular filter worked perfectly… it had a good flow to it. I think you could probably use a pond pump too.
- A basin for the water to be pumped in and out of. We used our big wheelbarrow, but a big storage container (like the big Rubbermaid tote ones like this) would work too. You probably have something that will work at home so you shouldn’t need to buy one.
- All of your normal building supplies.
- Rough sand (my husband picked this up at the store).
- Gems, shark teeth, arrow heads: You can buy these type of items on Amazon. We had a local gem event the weekend before the party and we purchased ours at the event (because we were concerned it wouldn’t arrive in time if we ordered online). But we were considering purchasing them through Hypnotic Gems on Amazon… and the company offered to make us a special order if we wanted a mix. We got 5 lbs of rocks to mix into one bag of sand, plus a bag of arrow heads and a bag of shark teeth).
- A small shovel.
- Some small containers for kids to dump their look and look through it. If you want, give the kids tweezers and a magnifying glass so they’ll be able to work on fine motor skills too.
- Optional: A book on identifying gems so they can figure out what they found. This is a great way to make this an educational activity. Some of the gem packages from Hypnotic Gems on Amazon do come with a small ID guide though.
- National Geographic, Everything Rocks & Minerals
- The Smithsonian Rock & Gem Book (a favorite that we checked out at the library)
How to Build a Mining Sluice
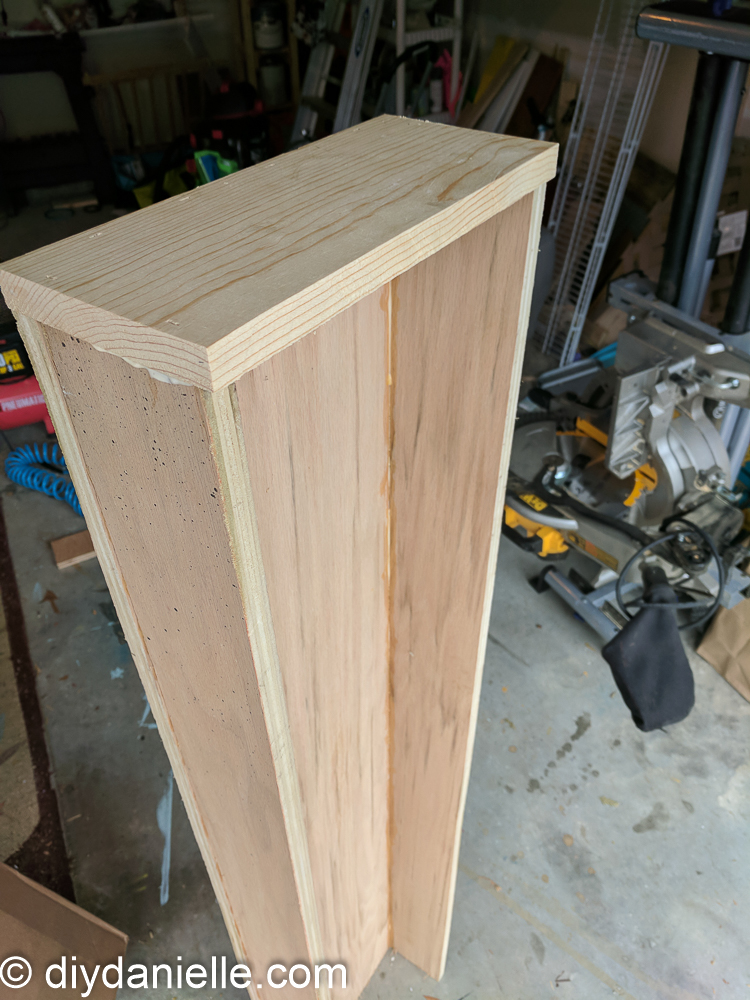
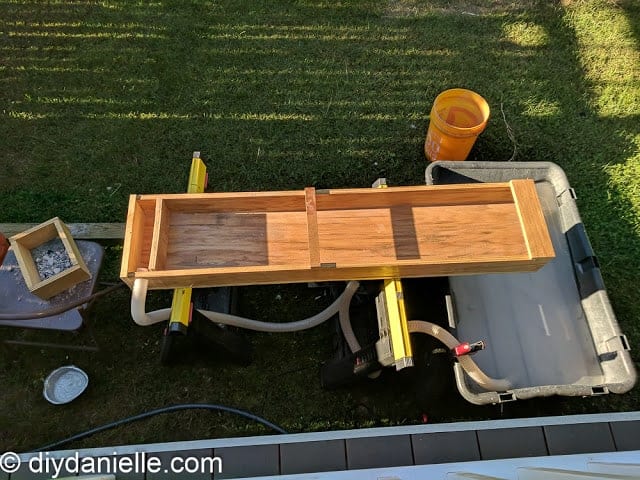
Build your frame for your sluice. This needs to be long and thin if you want to fit more than one kid using it at a time. We were using scraps from our wood stash and we just went with whatever we had! It worked great.
You do NOT need to use our exact measurements, but we’re working on a building plan for it that I’ll be sharing at a later point (need to figure out the program first).
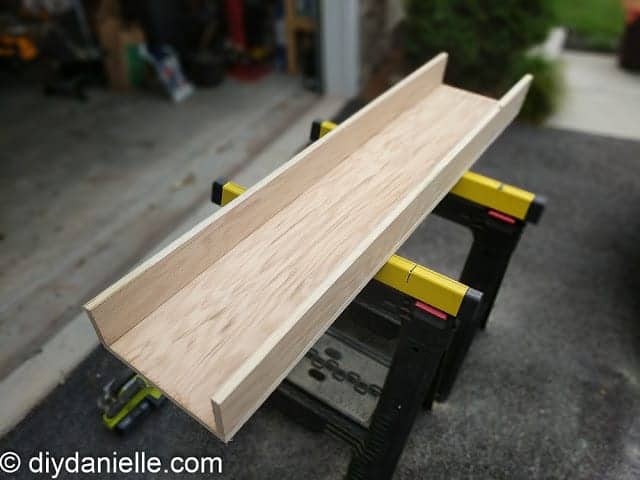
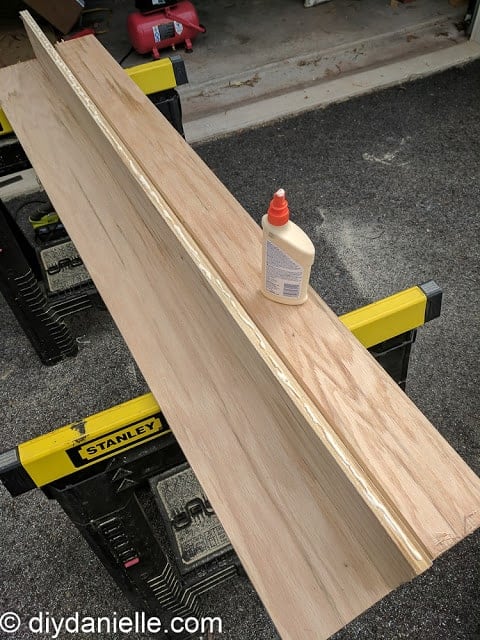
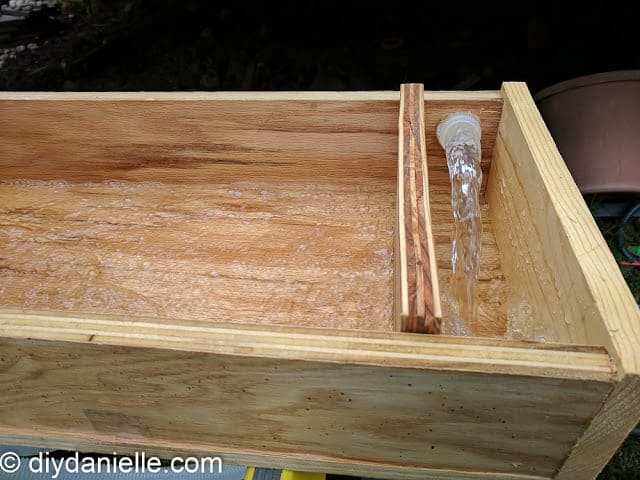
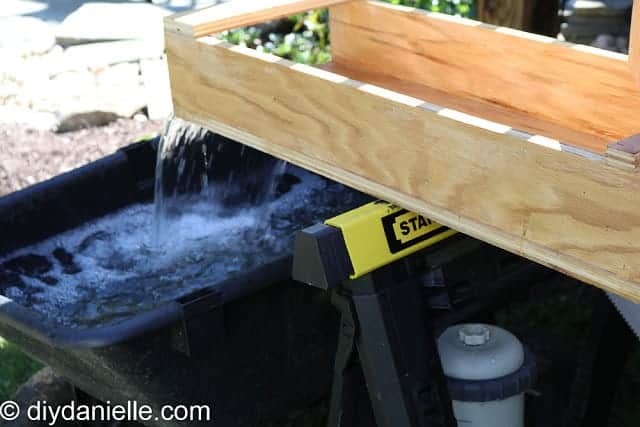
He sealed the joints with a glue that helped keep water from seeping out of the edges. It did the trick, although I’m sure there are better, more expensive, options if you were making something that needed to hold water for long periods of time. He drilled a small hole to put the hose through for pumping the water into the sluice. We tried it without (we clipped the hose, pointed down, to the edge), but a lot of water was splashing out the side that way).
He added a small piece of wood to the top area where the water flow came out of… then a couple pieces of wood along the top as additional supports.
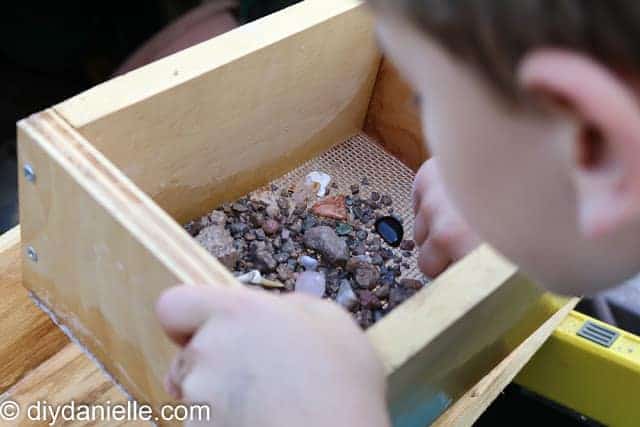
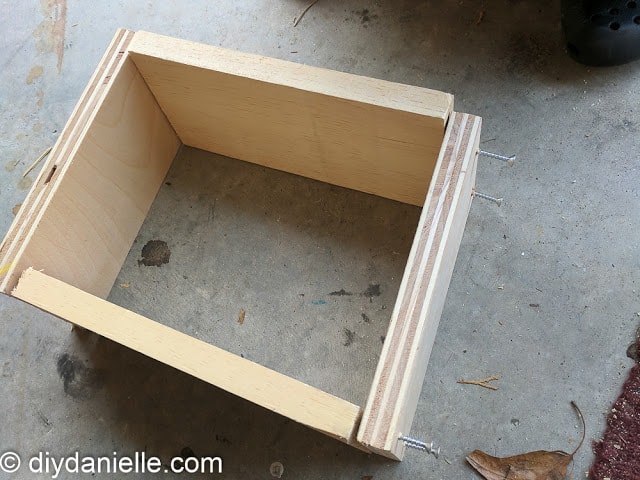
Now you build your box. Once the sides are built, you can use a heavy duty staple gun to attach the hardware cloth to the bottom of the box.
We only used one, but if you have a lot of kids coming then you may want more than one.
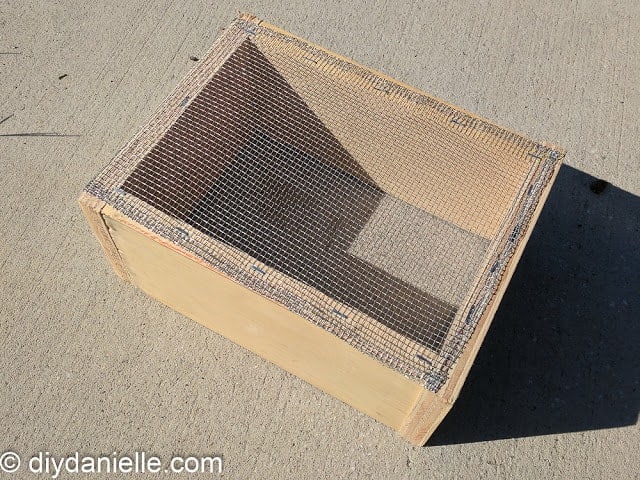
Once you’ve finished building both the sluice and your mining box(es), you need to apply several coats of polyurethane to them to protect them.
Sluice Box Plans
Want to check out the woodworking plans? Get them free by clicking below!

Setting Up the Mining Sluice
My husband used two sawhorses on a small slope to hold up the sluice. We placed a piece of wood for the kids to stand on so they could reach. You could alternatively use a table of some sort- but whatever you use, it should be pretty sturdy so it can hold the weight. Water weighs a lot. He placed the filter/pump under the sluice on the sawhorse. One hose drew water from the wheelbarrow and pumped it through the filter and up through the other hose back to the top of the sluice. The pool filter really did have a good flow rate for the project.
Gem Mining Birthday Party
We had a 5 gallon bucket filled with the sand mixture and gems. We mixed that all ourselves because buying premixed was more expensive and expensive to ship (purchased the sand at the store). We also liked being able to control what gems and items went into the mix.
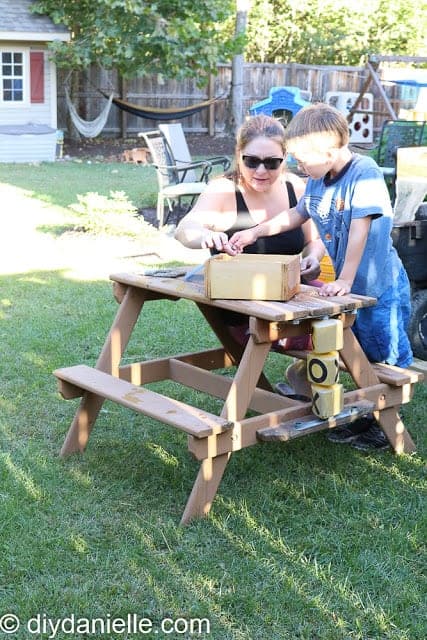
I recommend setting up a picnic table for the kids to sit at. We had small containers for them to dump the sifting box contents into… that way we could use the box for other kids while the kids who were finished could sort through the rocks and gems to pick out what they wanted to keep. If you want to keep the kids really occupied for a while, give them tweezers to use and magnifying glasses. Trust me. It takes forever and it’s good fine motor practice.
If you want to make this educational, keep a book nearby for them to look up what time of gems they found. This was SUCH a fun activity with the kids… I’d do it again in a heartbeat. We only needed to buy the rocks and the hardware cloth because everything else was stuff we had on hand so the project ran less than $50. The gems and such were taken by each kid as a party favor.
Please share and pin this post!
Want other kids projects or ideas? DIY Growth Chart | Outdoor Kids Toy Storage | Update a Plastic Playhouse | Best Birthday Favor Ideas | Best Outdoor Toys | Outdoor Kids Spaces
Cari Dunn
Friday 6th of October 2017
This is awesome! My son LOVES Minecraft. However, I am sick of it LOL