
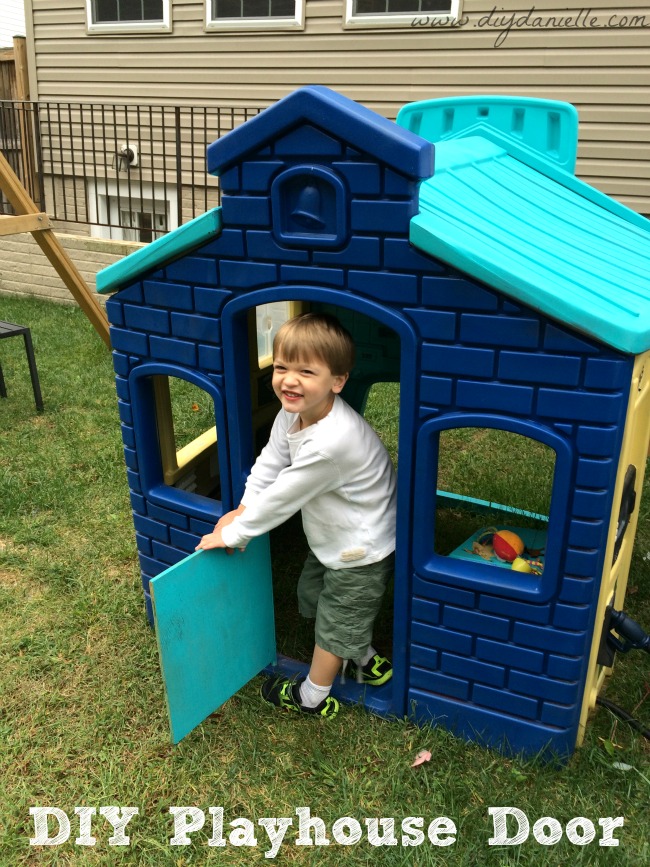
How to build a replacement door for a plastic playhouse. It was such an easy DIY and my sons are so pleased with it!
We found an old Little Tikes’ playhouse at the dumpster and I *painstakingly* repainted it all. I bought new parts, as possible. But the door was missing and the company didn’t sell the replacement door. And if you have toddlers, you know that doors are KEY. Opening and shutting a door can lead to hours of entertainment! So we decided to make one!
Supplies
Supplies listed below may include affiliate links to the products.
- Scrap wood
- PVC pipe
- Paint
- Building supplies (ie. screws and such)
Tutorial
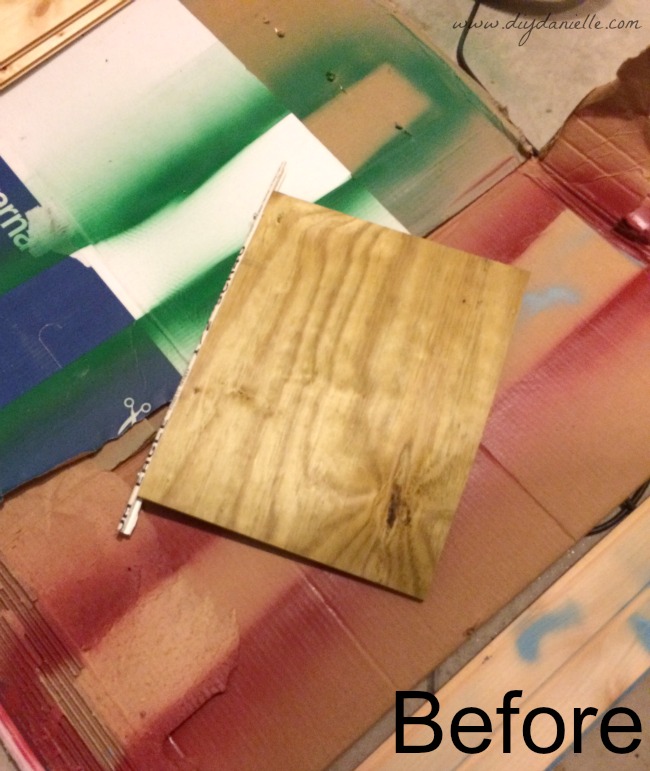
This is a super easy project. My husband measured the width of the doorway and decided on the height. Then he cut some scrap wood at the right width.He wasn’t sure how to attach it… there were holes for the original door so he just needed something that would fit in there. He decided to cut a piece of PVC pipe in half and screw it into the side of the door. This fit perfectly!
Once he got the door finished, he was able to see if he needed to trim off some more of the edge so it would fit in the doorway properly. He did need to trim it a bit. He made it EXACTLY the right size so the door shuts tight and stays closed. There’s no latch on the other side so it has to stay close on its own.
When I first painted the playhouse, a couple people mentioned to be careful of making the door in a way that would allow little fingers to get pinched. Knock on wood, but that hasn’t happened at all. I think it helps that it’s only a half door and it doesn’t really slam hard.
Once it was cut to the correct size and ready to be installed, I painted the door. I used spray paint but this type of wood doesn’t seem to work really well with spray paint. Perhaps regular paint would have worked better? I’m not sure. This is all I had that matched the playhouse so that’s what we did!

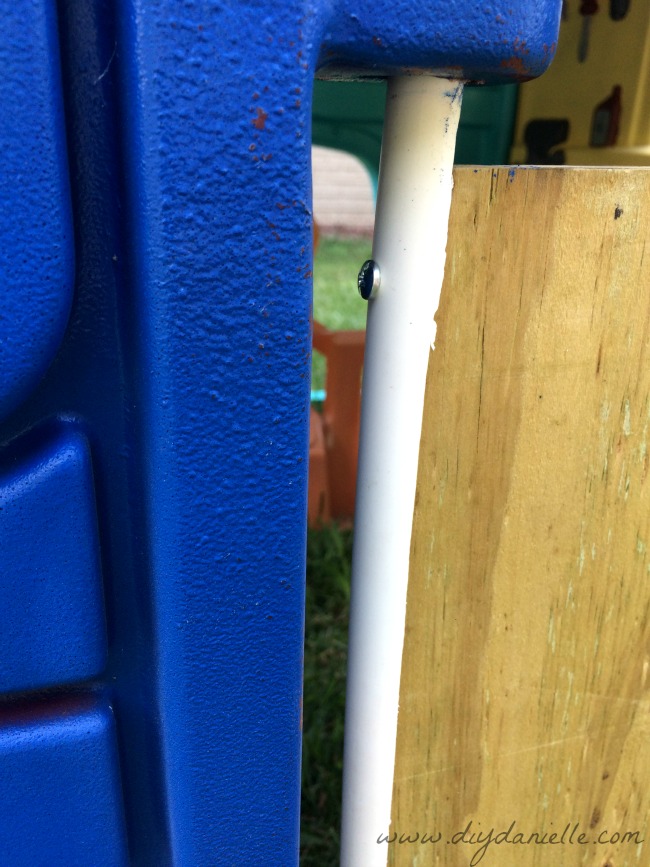
Here’s a closer look at the PVC on the door.
Don’t forget to check out my original post on how I repainted the plastic playhouse!
Thanks for taking the time to read this post! I really appreciate the time you’ve taken. Please share, like, and pin my post if you enjoyed it. Follow me on social media and subscribe to my email list to keep up to date on all of my latest projects!