

Ack, so two days before a birthday party I got the gift we bought for this little girl… and I promptly decided the gift would best be accentuated by an art bag. Yeah. So that’s why at 10am I finished up the project and the party was at 11am, leaving me barely enough time to shower. And I’m a nursing mom with a spit up baby so I NEEDED a shower. Not optional. I’m just glad I managed to finish this in time and it came out pretty well, despite being quite a bit larger than I expected. For some reason when I was cutting the fabric out it seemed so much smaller. It’s about the size of those fabric grocery bags if you want a good idea how big this is. You may want to scale it down if you make your own.
So if you’d like to make your own art bag, here’s the information on how to make it.
First you want to cut your fabric (wash and iron first, of course). You may want to double check that these numbers make sense. I’m trying to remember this using algebra… not a good sign because I’m not the math whiz I’d like to be. Also, this bag was quite large so you may want to scale it down a bit.
This is what I think my cuts were… for the fusible interfacing, you may want to go slightly smaller than those sizes to account for the seam allowance:
- Outside Fabric (Tinkerbell):
- Bottom: 12.5×6″
- Small Sides (2): 15.75″ x 6″
- Straps (2): Unsure of measurements, you’re on your own here.
- Large Sides (2): 15.75″ x 12.5″
- Pockets (2): 12.5″ x 6″
- Fusible Interfacing:
- Bottom: 12.5″ x 6″
- Small Sides: 15.75″ x 6″
- Straps (2):
- Large Sides (2): 15.75″ x 12.5″
- Inside Fabric (white):
- Bottom: 12.5 x 6″
- Small Sides (2): 15.75 x 6″
- Large Sides (2): 15.75″ x 12.5″

These pocket pieces are going on the right sides of my white fabric (the inside fabric). I just pinned them in place and then sewed the lines for the pencil/pen pockets. I didn’t sew along the far edges or bottom as that will get sewed up when we do the rest.


Here I am also making the straps. Sometimes I like to take care of the smaller pieces of the project first so they’re ready for me. I just folded over the edges, ironed and sewed around these… I really don’t like turning and top stitching for straps and the interfacing makes that task extra difficult. Better to avoid it in my opinion.


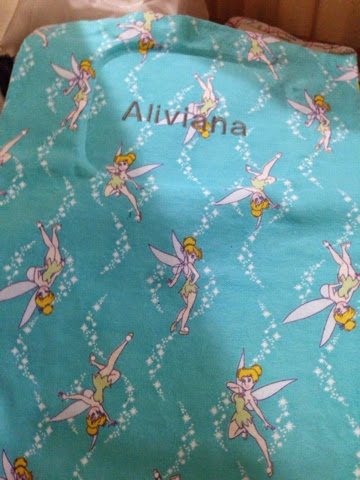
I embroidered one side of the outer fabric with her name for the front of the bag.
Then I took all four sides of the bag and sewed them together. I started by taking the big side and the little side, lining them up right sides together, and sewing. Open. Then add on piece by piece.

When all four pieces are lined up and sewn together, you can sew the far ends of them together so you create the outsides of the bag.

Next you want to take the piece for the bottom. The best way to do this is to pin it on first. Make sure you’ve got it on the correct end if you embroidered a name. You want to pin this onto the bottom so the right sides face each other and the wrong sides are facing out towards you. Then you sew around with your seam allowance (1/2″ or so, I believe). Once done, I cut the corners (don’t cut the stitching, just the excess). Now your outside is complete.

Here it is standing up:

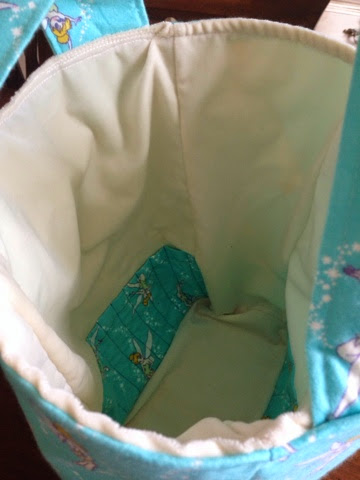
I repeated the same thing with the inside fabric, except I serged the edges on it because the white fabric I’m using tends to fray a lot. I turned the inner part of the bag so the right side facing out, towards the right sides of the outer bag once it is inserted into the outer bag. Pin all the way around. Sew around, leaving a place to turn the bag right sides out.


Once you do this, you really need to just add the straps and top stitch around. I could’ve added the straps in the last step, but I prefer to seam rip exactly where I want the straps to go, push them in and line them up just like I want them, then top stitch. I just felt like that would be the best way to get them perfect.

After top stitching, it’s done! If I do another, I’d be tempted to top stitch around the outsides of the bag, along the sides and bottom. I didn’t have time for that and I was petrified doing it would ruin my hard work- but I THINK it might work and look nice.
 |
| Outside |
 |
| Inside |
G, holding it and checking it out before the party….

