
How to build your own distressed DIY entertainment center with bookshelves, under cabinet lighting, and storage space. This DIY TV stand will upgrade your family room space!
This post may contain affiliate links which may earn me commissions should you click through them and take certain actions. As an affiliate for Amazon, Cricut, xTool, Home Depot, and other sites, I earn from qualifying purchases. Please DIY carefully. View my full legal disclosures here.
Please read the whole post so you don’t miss any important information!
Originally posted May 10, 2014. Updated January 21, 2020 with new photos and details.
This TV stand/entertainment stand is one of the cooler projects we’ve done, and it was a LOT of work. It took us about three weeks total. My husband did the majority of the work on this. I did the organizing and the painting.
All that time though? Totally worth it! The project had a huge WOW factor when we had people over. Whenever I spent time in that room, I felt that wonderful glow of pride that comes from the satisfaction of a DIY job done right! Sometimes we’d be sitting in front of the TV at night and I’d look at my husband and say, “Wow. We did good.” I’m so cheesy.
I’m going to do a run down of each step, but I also have a detailed tutorial for each step so make sure to check those out if you need the specific details!
Wondering what we had our TV on before? Here’s my DIY Rustic TV Stand that I made from an old bureau.
Cost of DIY Entertainment Center:
If you are planning a renovation, get the free printable bundle that will help you track important information about renovation plans, paint colors, and more!
- Cabinets, Countertop, and Base: $569.76
- Wood for Bookshelf & Trim/Miscellaneous Other Supplies: $427.05
- Desk Grommets and 2″ Forstner Bit: $25.90
- Two more cabinets: $122.00
- Cabinet Lighting: $34.75
- Cabinet hardware: 10 Pack – Cosmas 9009ORB Oil Rubbed Bronze Twist Cabinet Hardware Handle Pull – 3″ Inch (76mm) Hole Centers: $19.95 (plus two leftover from another project)
- TV Mount: $28.69
- Painting Supplies: $9.94 (I had everything besides some extra sandpaper that I needed)
Total Spent on Project: $1,238.04
Money-saving tip: This set was made with stock unfinished cabinets from Lowes. I purchased a Lowes coupon off eBay that could be used online. Then I clicked through to the Lowes site from Rakuten and scheduled my order for pickup at Lowes. Make sure you order all of your supplies at once to take full advantage of the coupon! In the end, I got the coupon discount + the Rakuten discount as well. This just allowed me to save a few extra dollars.
Tools Used
At the time we made this, we didn’t have quite as many tools as we do now. We were able to borrow a couple of items that we needed (check to see if your library or town has a tool lending library), we purchased a few items, and we had some things on hand.
- Drill
- Circular Saw
- Wood glue
- Brad Nails and Nail Gun: I used a big air compressor, but Ryobi makes a more compact brad nailer now.
- Fortsner Bits
- Amerock TMPMULTI Cabinet Door/Drawer Hardware Installation Template Combo Pack
If you don’t have any tools, this Ryobi kit has the brad nailer, some batteries, an impact driver, a circular saw, and a drill which is nice. It’s a pretty good kit to get your started.
I don’t think we had a miter saw when we did this project but that would have been nice too. The circular saw does do a lot of the things a miter saw or table saw can do, it just doesn’t do them as easily, safely, or as well.
At one point in our DIY journey, we would hand cut (with the old saw) the wood for projects. That didn’t last long because it made projects time consuming and horrible, haha.
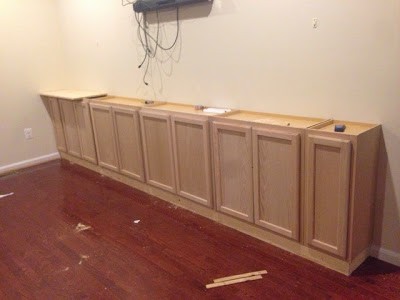
Using Cabinets for the Base of the Entertainment Center
We used upper kitchen cabinets for the base of the entertainment center. These are very easy to install and one of the faster parts of this project. We built a base for this set of cabinets, but for our second DIY entertainment center, we made them floating with legs.
The cabinets are mounted to the wall on studs so they can’t be ripped out if weight is added to them. The base or legs are important because you’re putting a lot of heavy things inside these cabinets if you plan to add books, DVDs, etc.
The downside to using stock cabinets is quality- they won’t be as high quality as handmade cabinets, but for the beginning DIY’er, they’re the best option. You can, of course, buy more expensive brand cabinets as well.
I use unpainted cabinets which means I don’t need to sand anything down to refinish. You could save money by buying cabinets used online or at the Restore (this is a thrift store for home building supplies).
Don’t forget to pick up the end pieces to cover the cabinets on either end (if they’ll be seen).
Read more: Cabinet Base for our First Entertainment Center and Easy Living Room Storage Cabinets (our second entertainment center)
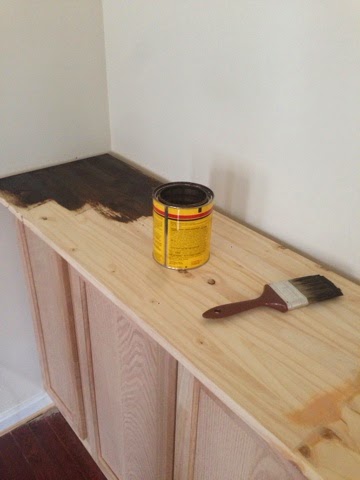
DIY Wood Countertop
The countertop was also pretty easy to add on. Ideally, you would have a larger enough board to cover the whole length of your cabinets. If we’d had a smaller tv stand, this might have been feasible.
We had to join together several pieces of pine wood for the top due to the length of the entertainment center.
The first time we did this, we used dowels to join the individual pieces together. The second time, we used a Kreg and added pocket holes. Either way works, but the dowels used fewer tools.
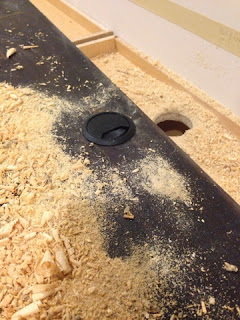
You can add a hole in the countertop to run your wiring through with a forstner bit or you could also decide to put the wiring through the wall. We don’t hide our wiring, just because we don’t like putting more holes in our wall than necessary. We also had wires coming from different areas so it didn’t make a lot of sense.
Read more: DIY Wood Countertop
Painting the Entertainment Center
The nice thing about finished cabinets, should you find a finish you like, is that you can skip this part for the cabinets. The problem is you’ll need to match your bookshelves to the cabinets as those will need to be painted.
I really like farmhouse decor so I decided to distress the whole entertainment center. I painted, sanded strategically, applied stain, then used poly as a top layer. It’s a lot of work!
For our second entertainment center, I stained, dry brushed to distress, and then added poly. Either way is a lot of work, but I don’t like sanding so that’s my preference.
The countertop is just the coordinating stain with several layers of polyurethane to protect it.
Read more: Built-in Entertainment Center: Painting and Distressing
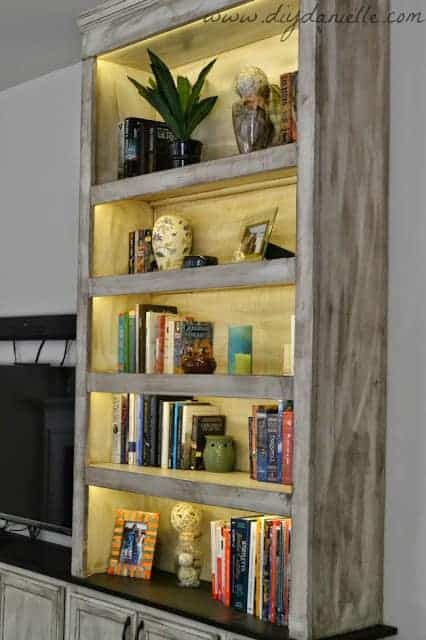
Adding Bookshelves
We wanted to add bookshelves to frame either side of the television. This was a bit more work than the rest of the project.
The space wasn’t even on either side of the television and we wanted our bookshelves to be the same width. As such, we added two cabinets, stacking, on the left side of the entertainment center. Then we added the first bookshelf, then the TV, then the second bookshelf.
We built the shelves using wood in the garage and then moved them onto the counter.
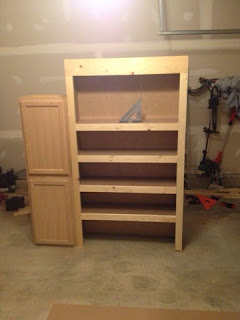
Once they were in place and mounted to the wall, we adding trim. These shelves HAVE to be mounted to the wall; they’re heavy and you don’t want them to come crashing down.
Adding trim to the front of the shelves gives them the finished look (and gives you a place to hide the wiring for your lights. You want to attach the trim with wood glue and a brad nails.
Recessed shelving would also be an option for smaller entertainment centers.
Read more: Built-in Entertainment Center: MDF Bookshelves (first house) or DIY Bookshelves (second house)
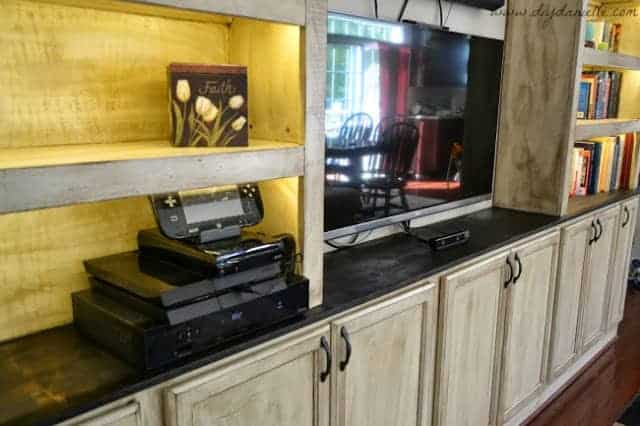
Wiring and Mounting the TV
We could have run the wires behind the wall, but we had the TV mounted to the wall and the other items we hooked up to the TV were on a bookshelf. So we drilled a hole in the countertop to run the wiring down into the cabinets below to the electrical outlet.
The black things that pop into the hole are called desk grommets and they just make the whole thing look nicer.
The TV was mounted to the wall, although we could have simply left it on the counter. I like the look of it best that way.
Read more: Built-in Entertainment Center: Electronics
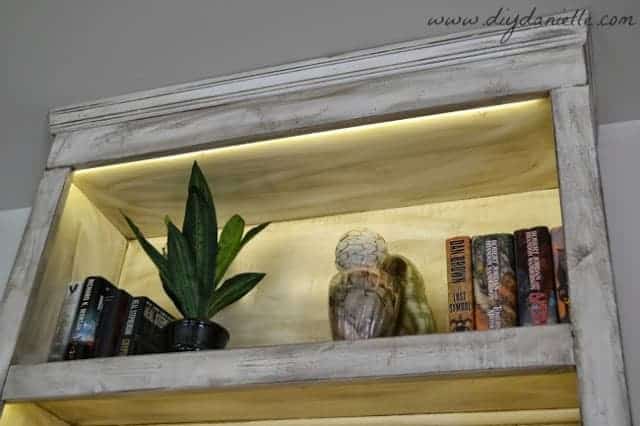
Under Cabinet Lighting
We got a quote from a local electrician on under cabinet light and it looked like it would run around $1,000. Obviously this was out because that’s how much we spent for the rest of the project.
My husband is pretty handy with soldering wires though (he works with computers for his job) so it ended up being a pretty simple job and I wrote a whole post about how to install under cabinet lighting.
Here’s a quick photo of the lighting running up the side (this was just the wire, not the lights themselves).
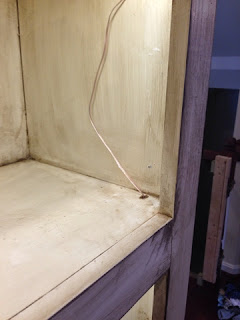
The lights we choose aren’t part of the wiring in our home, but they plug into the outlet inside the cabinets. Doing it this way made the project much cheaper to pull off.
The lights are GORGEOUS and nobody would know they weren’t hardwired. They have a sticker on the back so they were stuck on behind the trim.
Read More: How to Install Easy Under Cabinet Lighting
Adding Hardware to the Front of the Cabinets
We also added these cabinet hardware to the front of the cabinets. You can make your own template or just wing it, but a template helps. It will make installing the hardware faster. We used the Amerock TMPMULTI Cabinet Door/Drawer Hardware Installation Template Combo Pack.
The template just sits on the edge of your cabinet door, allowing you to mark the spots you want to add your handles. Remove template, mark the rest of your doors. Just make sure to follow the directions on your template.
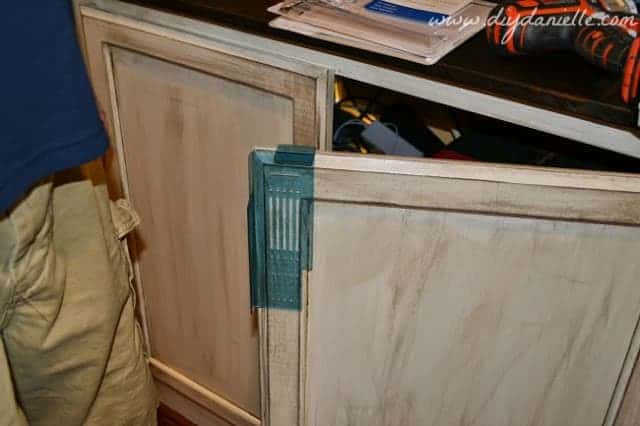
Then you just drill through and screw the knobs/handles on.
Pretty easy and they all end up exactly the same which is nice.
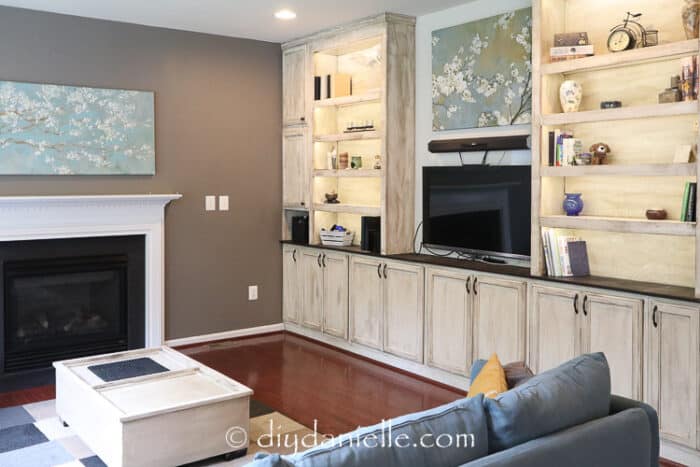
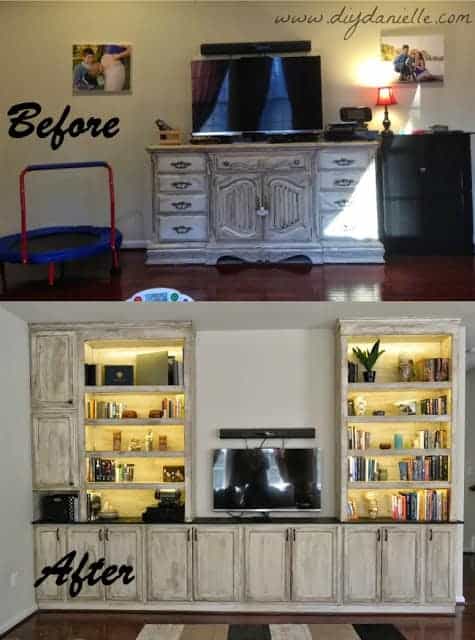
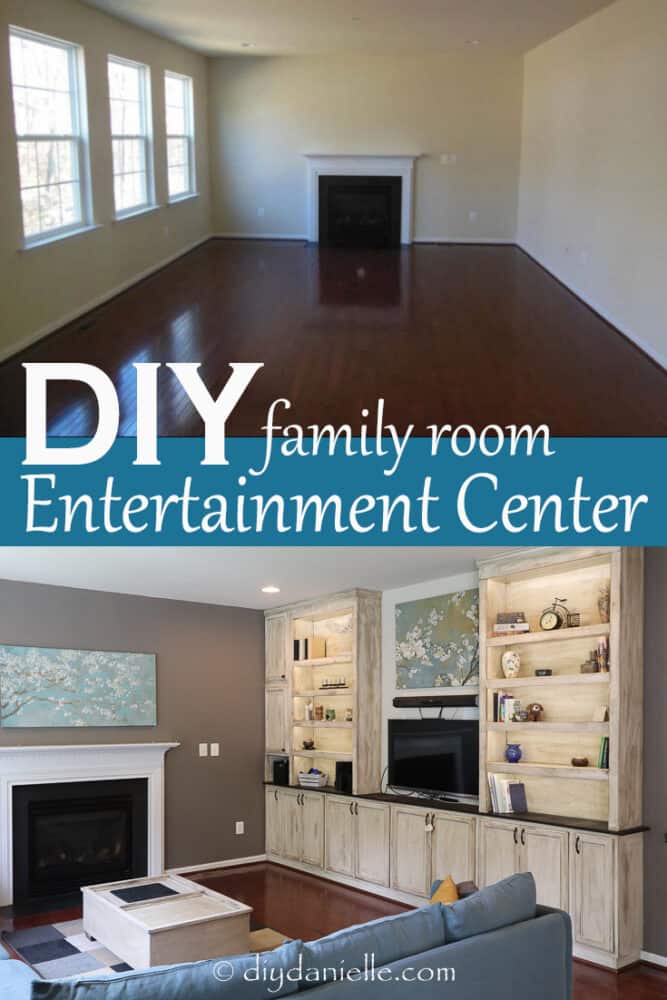
Final Photos
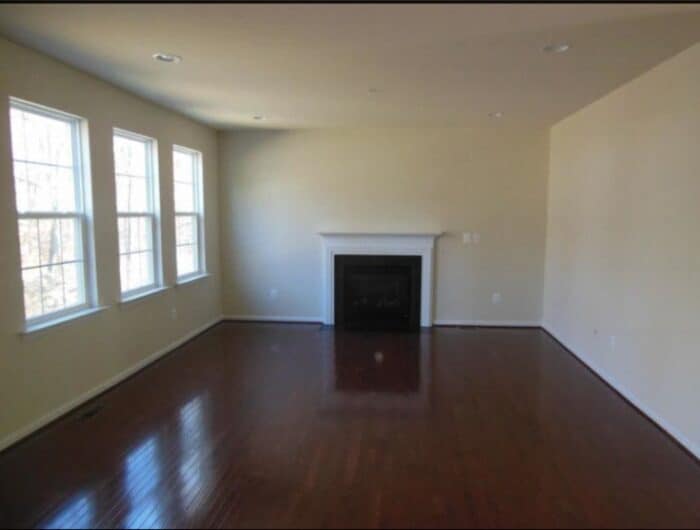
First, this is the room before we moved in. Huge space and no personality.
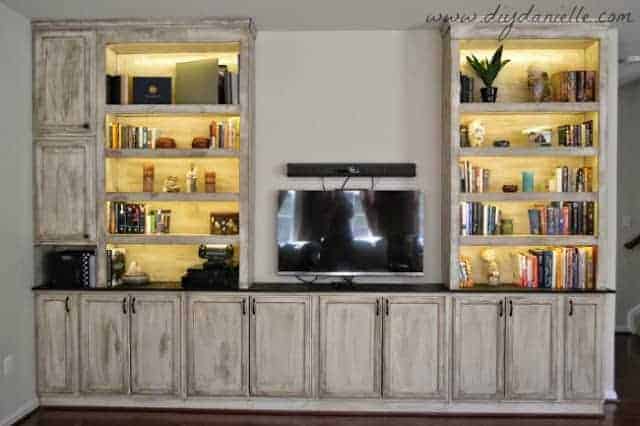
Don’t the built-ins just add so much personality to the space?! I love how they look custom, even though the cabinets were just the in stock stuff carried by the stored.
Gosh I could look at this ALL DAY LONG. My husband rocks.
The photo quality on these is all over the place because some are newer photos as I’m updating this post years after we did the project.
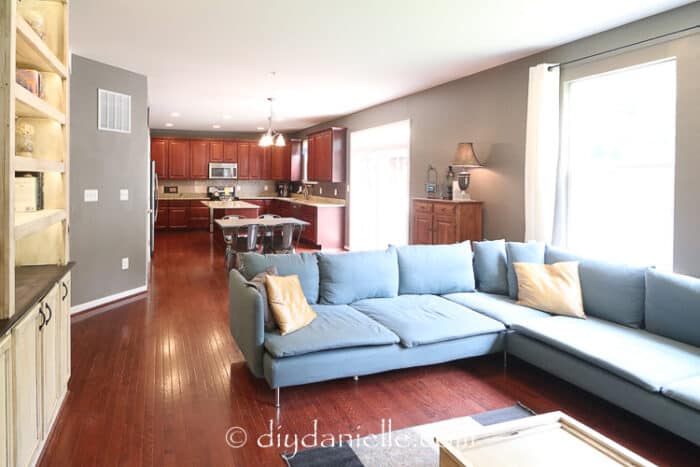
This is an angle looking from the family room into the kitchen. The open floor plan in our home allowed for a lot of freedom with adding such large built-ins without making the space feel small.
This project was inspired by the built-ins done by Addicted2Decorating. Check out these other Built-In Entertainment Center ideas. These unique drawer pulls might be a great way to customize your built-ins! Looking for a place to put the remote and charge your phone near the couch? Build a DIY sofa table with a recessed outlet!
Please share and pin this post! If you make this project, share it in our Stuff Mama Makes Facebook Group. We have regular giveaways for gift cards to craft stores. You can also tag me on Instagram @doityourselfdanielle; I love seeing everything you make!
DIY Entertainment Center with Farmhouse Appeal
Learn how to build your own distressed DIY entertainment center with bookshelves, under cabinet lighting, and storage space.
Materials
- Cabinets, Countertop, and Base
- Wood for Bookshelf & Trim
- Desk Grommets
- Cabinet Lighting
- Cabinet hardware
- TV Mount
- Painting Supplies
Tools
- Drill
- Circular Saw
- Wood glue
- Brad Nails and Nail Gun
- Fortsner Bits
- Amerock TMPMULTI Cabinet Door/Drawer Hardware Installation Template Combo Pack
Instructions
- Mount the base cabinets to the wall on studs so they can’t be ripped out if weight is added.
- Add the wood countertop either using dowels to join the pieces together, or a Kreg with added pocket holes.
- Stain the wood countertop.
- Add a hole in the countertop to run your wiring through.
- Paint or stain the entertainment center.
- Add the bookshelves by using two stacked cabinets on the left side of the entertainment center.
- Add the first bookshelf, then the TV, then the second bookshelf.
- Mount them to the wall.
- Add trim with wood glue and brad nails.
- Mount the television to the wall.
- Add the cabinet lighting.
Recommended Products
As an Amazon Associate and member of other affiliate programs, I earn from qualifying purchases.
-

 10 Pack - Cosmas 9009ORB Oil Rubbed Bronze Twist Cabinet Hardware Handle Pull - 3" Inch (76mm) Hole Centers
 -
 Amerock TMPMULTI Cabinet Door/Drawer Hardware Installation Template Combo Pack
 -
 Cordaway 2" Desk Grommet, Adjustable Cord Cover, Cable Hole Wire Management, Three Different Sized Opening, Made In USA, Black Plastic (00201)
bill
Saturday 23rd of March 2019
all that work and you didn’t hide the wires?
Danielle
Saturday 23rd of March 2019
LOL! No, we didn't want to cut into the wall.
Farhan Ahsan
Thursday 28th of September 2017
This is a really lovely thing, and great instructions. Thank you!I have prepared a round up of 12 DIY Entertainment center and featured your project in my post: http://hngideas.com/diy/12-diy-entertainment-center-projects-and-ideas/