
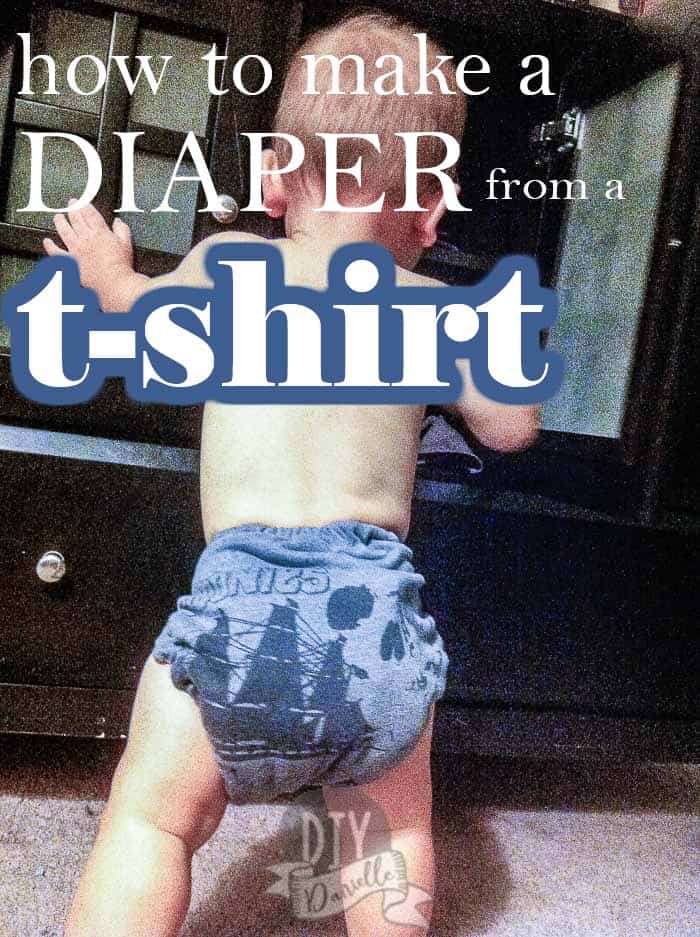
How to make a diaper from a t-shirt. One way to do this is no sew and one requires sewing. The second methods creates what is called a “Quick Snap Flap Wrap” diaper.
This post may contain affiliate links which may earn me commissions should you click through them and take certain actions. As an affiliate for Amazon, Cricut, xTool, Home Depot, and other sites, I earn from qualifying purchases. Please DIY carefully. View my full legal disclosures here.
Please read the whole post so you don’t miss any important information!
Being able to make a cloth diaper in a pinch is a handy skill to have, particularly if you can’t afford diapers or if the store is out. But many people LOVE using them as diapers normally too! It’s a great way to upcycle an old shirt; many people LOVE finding a way to keep using that beloved shirt that just isn’t fit to be worn on their back anymore.
Originally posted July 14, 2012. Updated March 20, 2020
Table of Contents
Method 1: How to Make No Sew T-Shirt Diapers
“Make” is a stretch here… you’re simply folding your t-shirt to use on your baby. This is a GREAT way to make diapers in a pinch.
This tutorial will show you how to make a “flat” diaper… a flat diaper is a rectangular diaper that has equal absorbency throughout the diaper.
She uses a Snappi to hold this on, but I’ve found Snappis don’t hold very well in t-shirt fabric (they do better for prefolds, at least from what I’ve seen). You can use some safety pins, just put your hand behind the fabric, between the t-shirt and your baby’s skin, so you don’t accidentally hit them with the safety pin! When I’m using a cover, I don’t bother using anything… the diaper cover will hold it in place.
The one thing to understand is that these diapers have NO waterproofing. You need to keep an eye on the diaper and swap it out when it’s wet. If you have a cloth diaper cover or plastic pants, you can put it over the t-shirt to help prevent wet from going through to baby’s clothes.
The nice thing is that you only need one or two cloth diaper covers because you can reuse them… just wipe the inside of the diaper cover out.
Washing diaper covers is easy too- you can hand wash in the sink and hang dry.
And you can TOTALLY skip the diaper cover- particularly if you’re stuck at home. Just keep an eye out and swap the t-shirt out regularly.
These are a FANTASTIC absolutely-free option for diapers.
Method 2: How to Sew QSFW T-Shirt Diapers
A quick snap flap wrap diaper is basically a fitted diaper, but it’s designed so it is quicker to dry. It’s also pretty easy to sew and isn’t as time-intensive as an AI2, AI1, or a pocket. They do require a cover though over them, especially for overnight. You might be able to get away without one during the day if you change the baby frequently and just have the baby hanging out around the house.
The pattern for the QSFW is located here and they even allow you to sell from it. Here is a link for adding the elastic to the QSFW. The link for adding the elastic should give you a pretty good idea how to make the QSFW so my pictures are mostly to quickly show a few steps of this process, especially in regard to using upcycled materials.
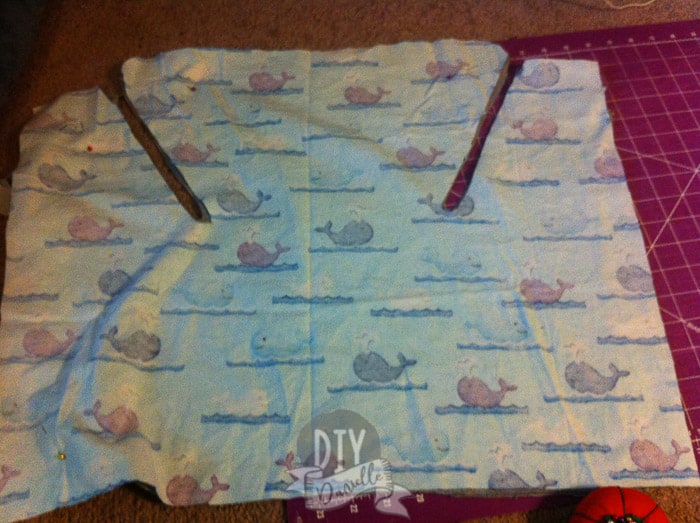
Using a larger t-shirt is best. I used a men’s t shirt folded in half… this allowed for two layers of the t shirt material. As you can see the t shirt wasn’t quite big enough to not catch the arms too, but I actually was able to just use the arms in it too. It worked.
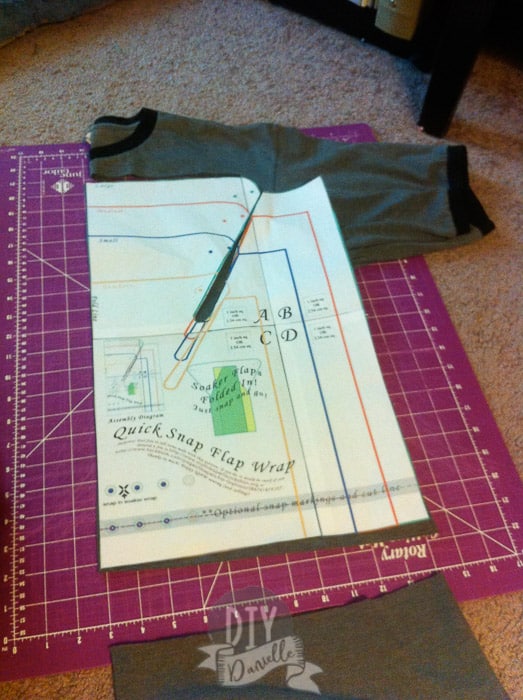
Here’s what it looks like once I cut the pattern out.
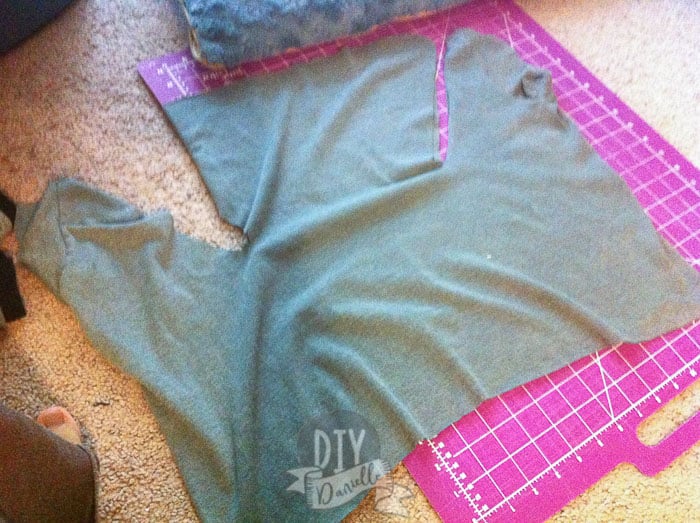
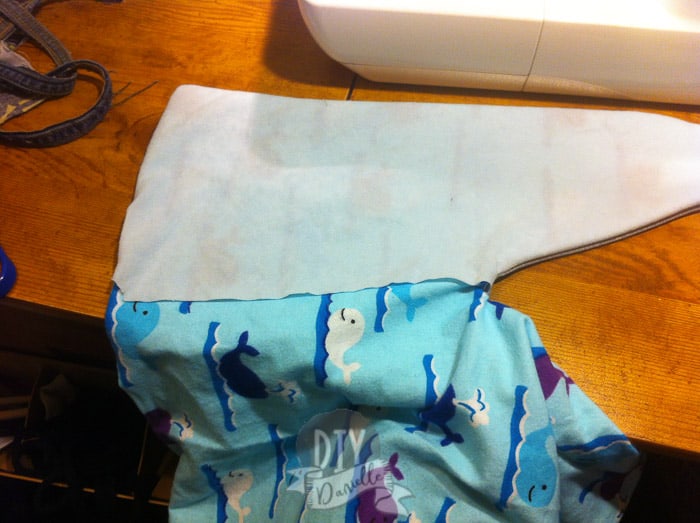
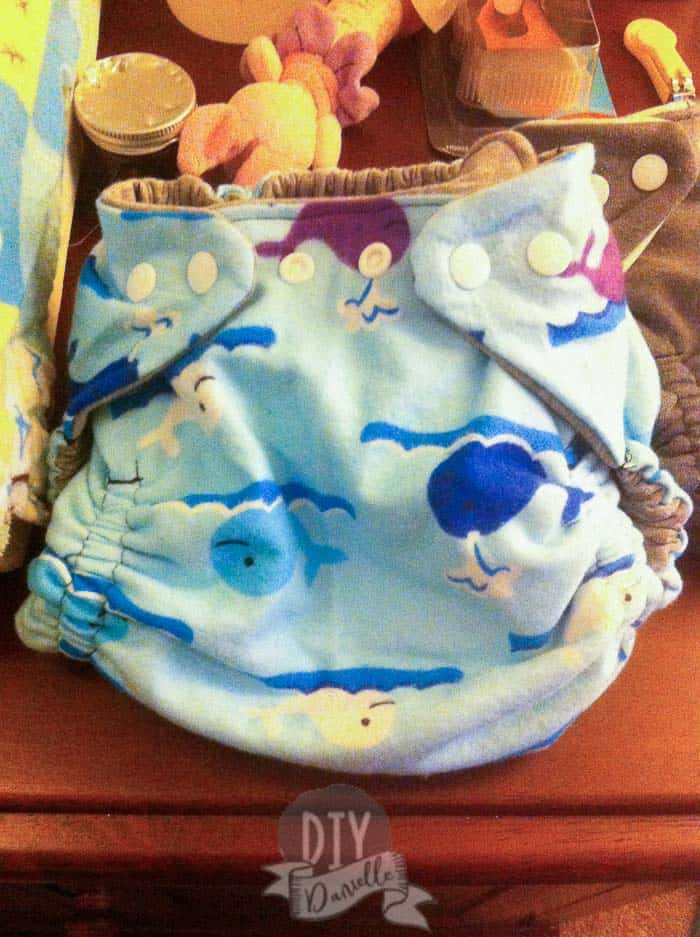
This is the back with the fun t-shirt design! If you love the t-shirt design on the front then it’s good to line up the design so it’s on the back of the diaper.

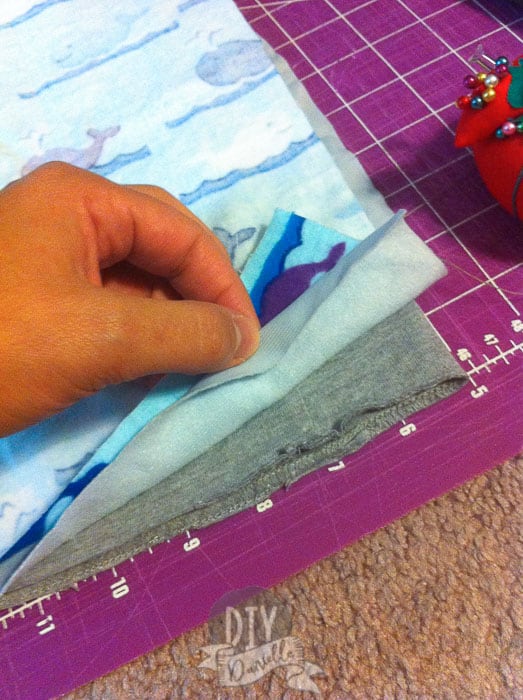
I made a second diaper with flannel (the blue nautical fabric) too. This was easier to cut out because you’re not working around the seams of a shirt and such, but it’s not free either. I love free.
THIS PART IS TOTALLY OPTIONAL. The diaper functions fine without it. When I made my tee-shirt diapers, I added a piece of alova suedecloth to the inside of one wing… I figured out the one wing size and cut a piece of the alova suedecloth to match it. This type of fabric wicks urine into the fabric underneath (the t-shirt) and makes the top feel more dry. Some fleece fabric would also work.
Update 3/20/20: In hind sight, now that I’m a more experienced sewist, I would skip this step. It over complicates the pattern. Instead, you can cut an easy cloth diaper liner and use that. It would be WAY easier. But I’ll still leave my explanation on how I did this!
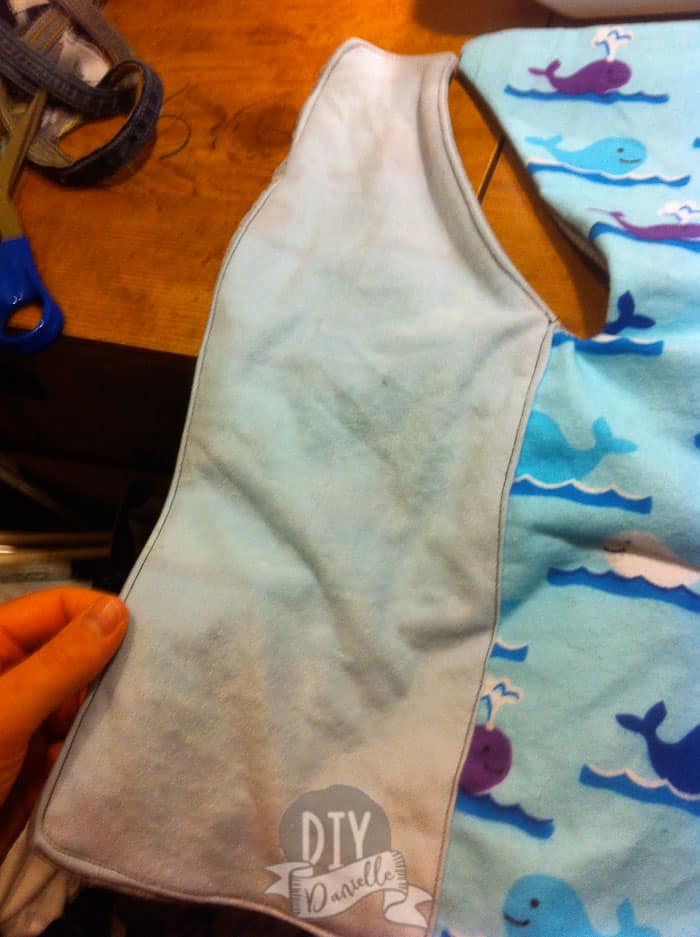
Make sure the right side of the fabric is facing the right direction. You want the right sides facing together as we want to sew, turn and topstitch for this.
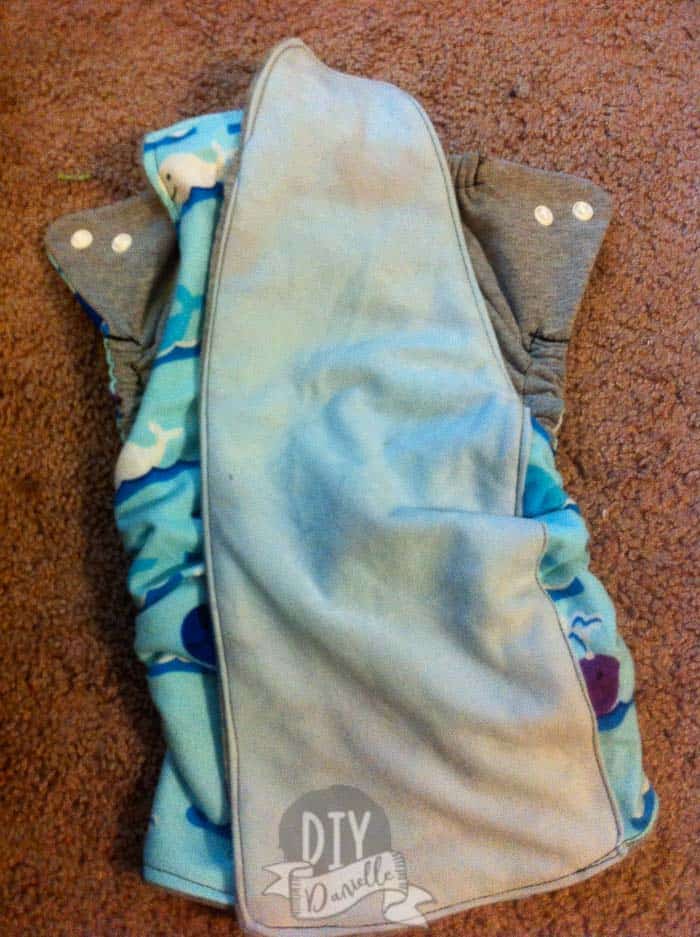
You can see my layers below for the flannel exterior diaper… I’m using gray tshirt material on one side of the diaper and flannel for the exterior. The suedecloth is sandwiched between.
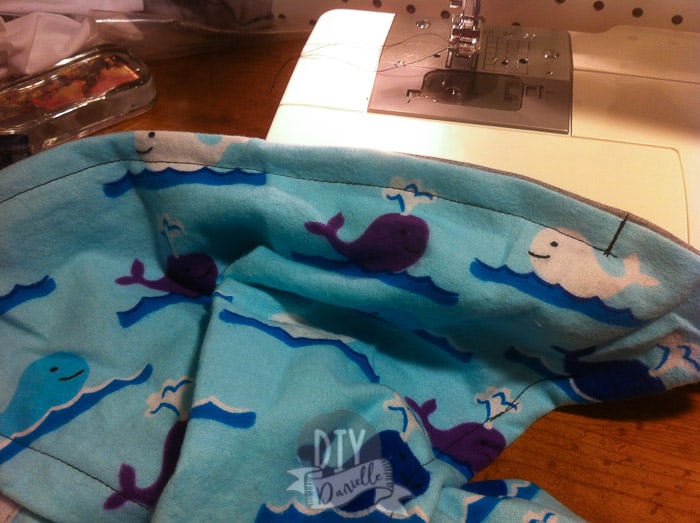
This is a photo of it all pinned together and ready to be sewn- it’s very easy to just sew around it all, leaving a small gap to turn and top stitch. Use a 1/4″ seam allowance.
Note that the inside edge of the AS isn’t finished. I also kept the turning hole at the bottom… that’s where you need it to add the elastic.
I wanted to finish the edge so I just turned it over once and sewed it down with a straight stitch.
While I was at it, I just top stitched this whole wing.
Add your casings, your elastic, then top stitch the remaining parts of your QSFW.
Learn more about sewing an elastic casing and adding elastic! It’s super easy.
Add snaps if desired- you can totally skip them though!
Here’s the inside, finished. I just make sure the wing with the stay dry interior is the top layer.
This is the front when everything is folded up!
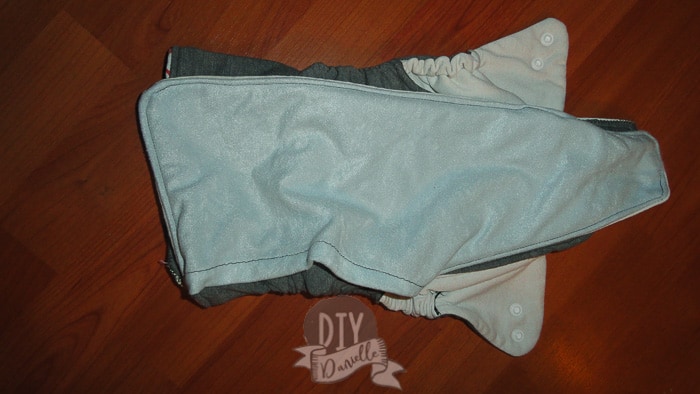
Here is the tee-shirt only version.

How to Wash T-Shirt Diapers
If cloth diapers are new to you, the big thing to understand is how to wash your diapers.
Rinse Solids
Until your baby is eating solids, the diapers can go right into the wash. Once your baby starts eating solid food- even purees- you’ll start seeing poop turn SOLID. Or solid-ish. The washing machine can’t wash this out. You simply rinse the diaper in your toilet… if it’s really solid you can just flip it into the toilet.
It’s all a bit gross, but you get used to it. Also you get to be very good at washing your hands thoroughly. (wink)
Washing the Diapers
The washing machine is EASIEST, but you can also wash by hand. I’ve washed diapers in my bathtub during a multi-day power outages and line dried before (much to the irritation of my HOA).
You want to use a “free and clear” detergent- NO additives like fabric softener should be used because those cause your fabric to absorb less urine.
I usually wash on hot, but I’ve washed on cold in a pinch. Nature of the beast if your electric is off and your hot water heater can’t work properly.
My preference is to rinse my diapers on cold. This gets out all of the major yuck. One this is done, I can do a full cycle on HOT. Or wash by hand on hot, ideally.
Here’s a blog post I wrote about washing our cloth diapers during a power outage.
Drying the Diapers
The diapers can be dried however you would normally dry a t-shirt! I use hot for all of my cloth diaper laundry, but you can also HANG DRY! Hang drying clothing is a great way to save electricity and money. It’s also useful if you don’t have a dryer, of course.
Plus sunshine and fresh air is GREAT for clothing and diapers.
Interested in sewing your own cloth diapers, reusable paper towels, reusable menstrual pads and more? Check out my eBook below!
Please share and pin this post! If you make this project, share it in our Stuff Mama Makes Facebook Group. We have regular giveaways for gift cards to craft stores. You can also tag me on Instagram @doityourselfdanielle; I love seeing everything you make!
Sara
Tuesday 26th of March 2013
This is fantastic! Thank you for posting.. I'm using Charlie Banana right now, but don't see them working out for more than a year for us. I would love to be able to make him new ones for when the time comes!