

How to create a memorial wall to honor lost loved ones and help feel connected after they’re gone.
This post may contain affiliate links. Using these links helps support my blog. Thank you!
My friend Hilda is doing a blog series about organizing and decluttering sentimental items this month. I mentioned to her that decluttering after a loved one passes would be a great topic and she asked if I would be interested in writing a guest post. You can check out my guest post on her blog, From Overwhelmed to Organized.
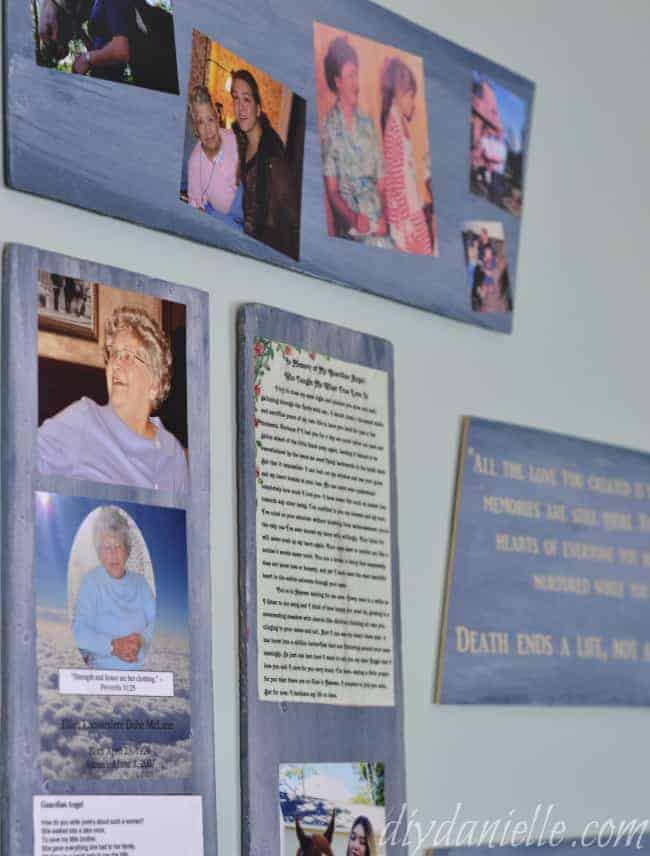
If you’re coming here from Hilda’s blog, welcome! I hope you enjoyed the post. I wanted to show how I made a memorial wall to honor lost loved ones. This has been a project that is dear to my heart because I am horrible at processing grief and loss.
 I read about this idea in a book years ago. The author’s family has a shrine setup for loved ones who have passed and they light candles, incense, or ring a bell to invite the spirit (more in a philosophical sense than a physical sense) of their loved ones into the home. I always feel more connected to those I’ve lost when I spend some time by my memorial wall.
This is my “before” wall. I have had this setup for a while now, but I wanted to make it nicer because… quite frankly… it’s outdated, I hate the frames, and I clearly can’t arrange photos very well.
I also decided to move it somewhere more private. I was torn about that because I like being able to see my wall as I go down the stairs every day, but I can’t really sit and meditate on the stairwell so I opted to move this into my closet. I’m working on an updated master closet and there’s a small seating area in there that will be perfect.
Supplies Supplies listed below may include affiliate links to the products. The Old Fashioned Milk Paint Company provided the paint necessary for this project.
- Lightweight scrap wood
- Silhouette Cameo , Cutting Mat, Weeding Tool, and 651 Vinyl
- Cricut Transfer Paper
- Mod podge, paint brush
- Command Strips
- Paints: I used Old Fashioned Milk Paint (OFMP) in Soldier Blue, Pitch Black, and Snow White
- For the area: A Tibetan Singing Bowl
Tutorial

Once that dried, I used mod podge on top of all of the board. I used about 3 layers of mod podge altogether.
I hung these up with command strips because they’re so lightweight.


Use the Discount Code DIYDANIELLE on cricut.com for 10% off any cutting machine or heatpress (no minimum). Excludes: materials/accessories/mystery boxes/etc. Applies to US/CA only, code expires 12/31/23.
What a fabulous idea to add some dimension to otherwise boring pictures! Thanks for sharing for the Home Matters party.