

How to Make an Essential Oil Storage Box. This easy to make container is perfect for an EO enthusiast.
This post may contain affiliate links which may earn me commissions should you click through them and take certain actions. As an affiliate for Amazon, Cricut, xTool, Home Depot, and other sites, I earn from qualifying purchases. Please DIY carefully. View my full legal disclosures here.
The majority of my content is generated by me, as are 99% of the photos and videos, but I utilize technology for titles, descriptions, video editing out all of my ums, and occasionally for text overlay on images.
Please read the whole post so you don’t miss any important information!
Essential oils have really taken off. I know many people use them medicinally and others use them purely for enjoyment. I think they are GREAT in a diffuser for making my house smell amazing.
But I think it’s easy to end up with SO MANY oils and no where to put them. Keeping them stored safely is important so they won’t break and are easily found. I decided to put together a quick tutorial on how to make an essential oil storage box. These would make great gifts too for a friend who loves oils.
Supplies
- Wood box (I measured my tallest bottles, then checked out the wood boxes at the craft store)
- Small wood pieces to use for dividers.
- Something to cut the wood with.
- Paint
- Optional: Silhouette Machine (or Cricut) with 651 Vinyl (permanent adhesive)
- Alternatively: Purchase an essential oil storage box, then decorate it.
How to Make an Essential Oil Storage Box
Check out this simple video or skip below to the photo tutorial.
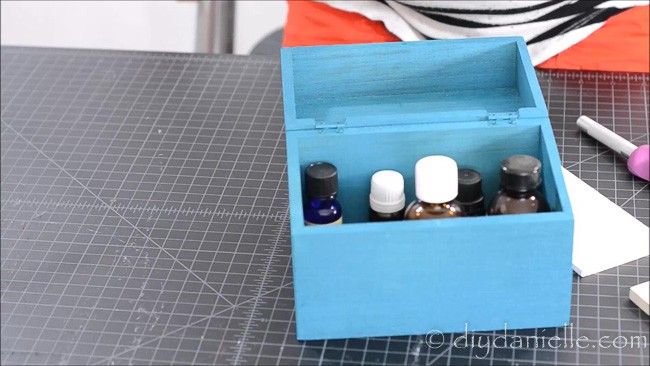
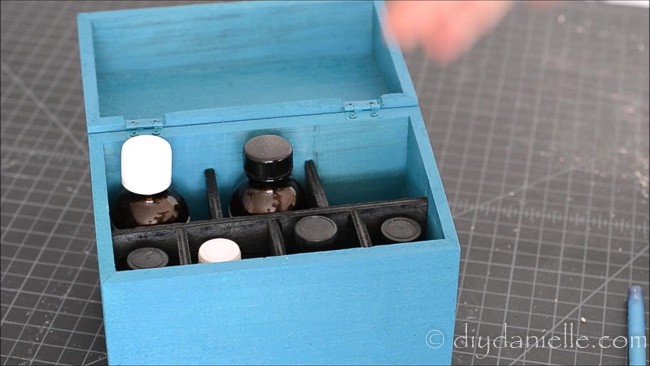
The small box is perfect for holding essential oils, but it needed dividers.
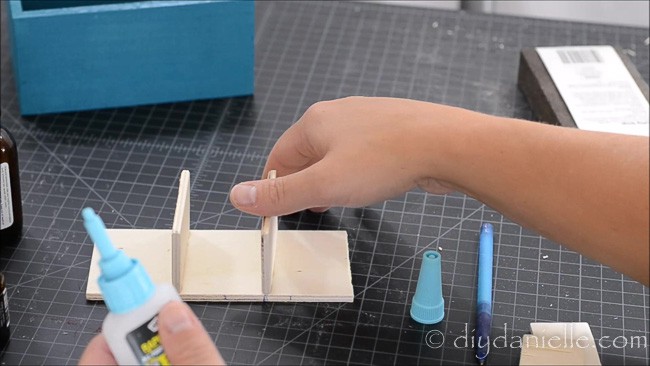
Cut a thin piece of wood for a divider.
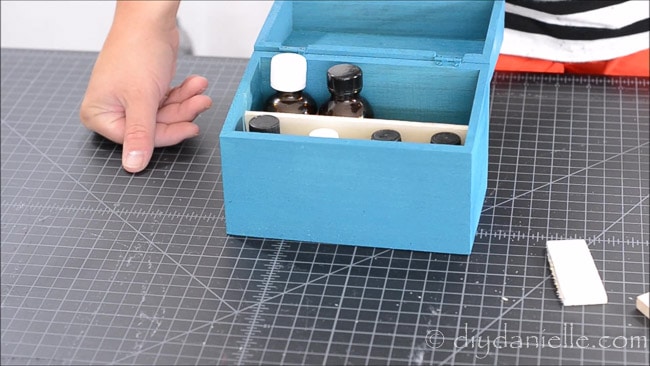
Now you need to cut some smaller pieces for the opposite direction. You can place them and situate your essential oil bottles, then mark where they’ll go. Remove the divider pieces from the box.
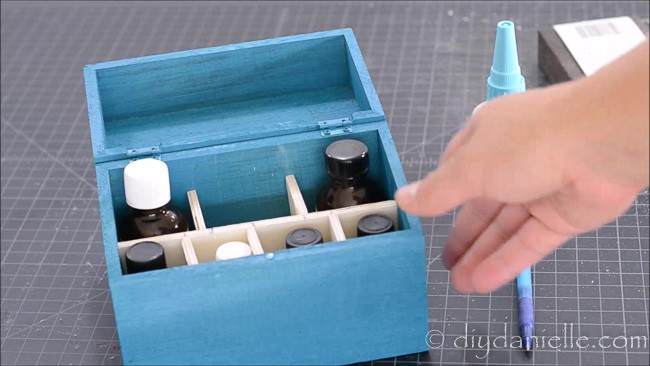
Use glue to attach the divider pieces where you marked.
Paint the divider, as well as the box.
Then add a label for the front, if desired.
Love it? Pin it!

Other posts in the series that you’ll like:
- Make your own Pot Holder
- DIY Grocery Bag Holders
- DIY Art Displays
- How to make Cloth Napkins or Wipes
- DIY Reusable Bread Bag (to give with fresh bread)
- Learn to make a Braided Dog Toy
- DIY Paper Mache Pokeball
- Recipe for Peach Infused Liquor
- Create a Large Pot Holder for a Casserole Dish
- DIY Fabric and Wood Cross
- Free Adult Apron Pattern
- DIY Cake Mix Cookies in a Mason Jar
- DIY Pillowcase
- DIY Library Tote Bag
- DIY Tile Coasters
- DIY Coffee Cozy
- DIY Bowl and Casserole Dish Covers
- DIY Dry Oil Perfume
- DIY Lunch Bag
- DIY Wall Decals
- DIY Pokemon Boo Boo Bags
- DIY Cement Candle Holders
- DIY Wood Step Stools
- DIY Easy Soy Candles
- DIY Cutting Boards
- DIY T-Shirt Stencils Using Freezer Paper
- DIY Balancing Wine Holder
- DIY Easy Concrete Planters
- DIY Reusable Gift Bags
Use the Discount Code DIYDANIELLE on cricut.com for 10% off any cutting machine or heatpress (no minimum). Excludes: materials/accessories/mystery boxes/etc. Applies to US/CA only, code expires 12/31/23.