
How to sew a DIY hanging herb bag. An easy, affordable alternative to planters.
This post may contain affiliate links which may earn me commissions should you click through them and take certain actions. As an affiliate for Amazon, Cricut, xTool, Home Depot, and other sites, I earn from qualifying purchases. Please DIY carefully. View my full legal disclosures here.
The majority of my content is generated by me, as are 99% of the photos and videos, but I utilize technology for titles, descriptions, video editing out all of my ums, and occasionally for text overlay on images.
Please read the whole post so you don’t miss any important information!
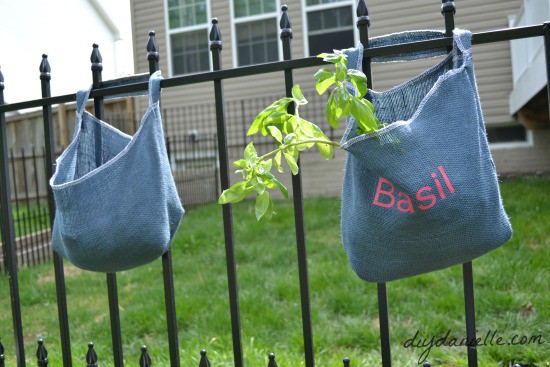
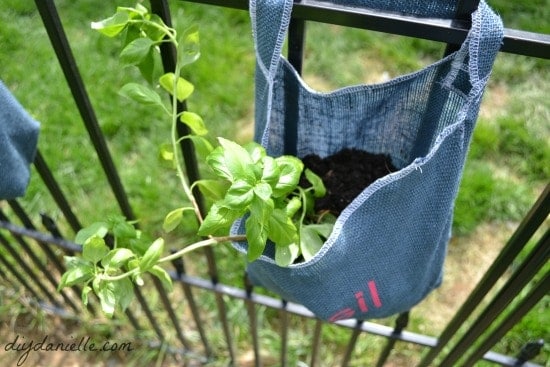
I needed planters for my herbs this year. I made the mistake of planting some parsley in the raised bed one year and discovered exactly how invasive it is! I didn’t want to buy planters, however, so I decided to sew some bags from burlap. This burlap was part of a curtain project that went wrong. Sewn into bags, these hung easily on our new dog fence.
My understanding is that planters from fabric are a great option because you get a denser root system. Sounds good to me, but I like these because they’re high enough to avoid the weeds.
I used a blue burlap that I got to review a long time ago. I found it fades in the sun so a burlap that isn’t dyed may be the best option for outdoor use. If you line with gardening plastic of some sort, these will last longer.
Supplies
Use the Discount Code DIYDANIELLE on cricut.com for 10% off any cutting machine or heatpress (no minimum). Excludes: materials/accessories/mystery boxes/etc. Applies to US/CA only, code expires 12/31/23.
I used a serger for this project. Burlap frays a ton so I didn’t want to try this with a regular sewing machine. You could do this project with a different type of fabric, however, that is less apt to fray if you don’t own a serger. If you do use burlap, make sure to clean your machine well afterwards from the fuzz.
How to Sew a Fabric Grow Bag
This is a fairly simple project if you are fairly familiar with sewing. I cut up my fabric. I found that smaller bags sat nicer on my fence. Make sure to cut a strap or two. I liked the look of one strap attached along the back best.

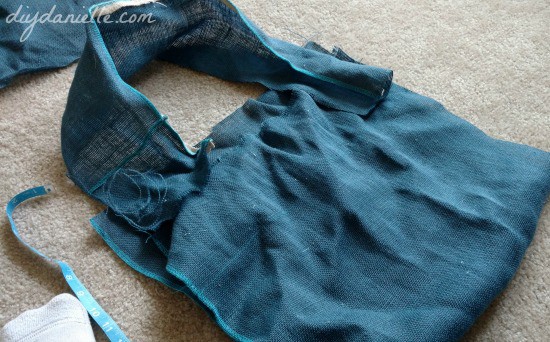
I folded my fabric in half, right sides together. I serged up both sides and then serged around the top to finish the edges. You can fold over the edges and straight stitch to finish it off or just leave as is.
Now you want to pinch the corners and serge a triangle off the bottom. This helps create a boxy bottom to the bag. You do this on both sides.
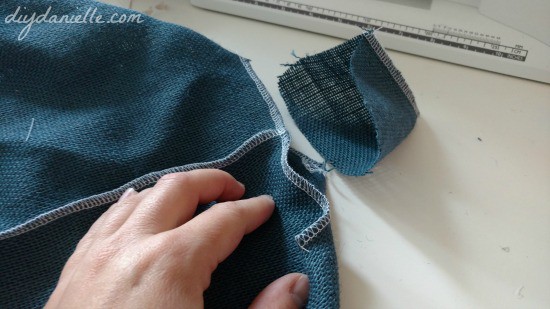
Turn side rights out. Serge your strap. Then pin to your bag. Sew on. I sewed across the top several times to make sure it was sturdy, then sewed a square. Do for both ends of the strap.

As you can see in the photo below, I used one strap for the basil and rosemary bag, but two for the parsley bag which was larger. I like the one strap on the smaller bag better honestly. Also, soil and plants are fairly heavy so the parsley bag may do better on the ground. If you really want to do a large bag, then a double layered bag might be a better option for stability.
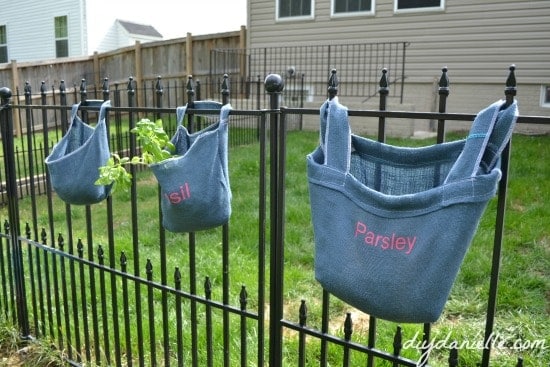
To finish up, I used my cutting machine to create some heat transfers to put on the bags that label each bag. The rosemary bag’s label is on the opposite side, whoops.
Here’s a close up of my basil bag! Please pin and share this post.

I LOVE LOVE LOVE these. I’m going to make a lot more of them because I have a lot of fence and a lot of herbs to plant! I may try some lettuce in them too.
Interested in gardening? Here are some other posts about gardening that I’ve written and you might enjoy: DIY Concrete Planters | Privacy Planters | How to Use Pine Straw as Mulch | 13 Stunning & Easy Garden Trellis Ideas | How to Setup a Pond and Patio | Gifts to Make from the Garden | Everything You Need to Know about Grow Lights
What a great idea!
Thank you!
Very cute idea! Sharing on my page tomorrow!
Lisa
Thanks for sharing Lisa!
This is such a creative way to grow herbs, I love it! 🙂
Thank you. 🙂
Hi Danielle! Your bags are adorable. I love them and I like the labels on them too. I wish I had a silhouette machine . Thank you for sharing with us at the Talented Tuesday Link Party. Enjoy the rest of your week, Kim @ This Ole Mom
That is such a fun way to grow herbs. Thanks for sharing with Kathe and I!
I love them! Okay, so for those of us with ZERO sewing skills (I mean, really, your four year old would do better), when are you going to make them to sell? Hmmmm? 😀 I'd buy some.
These are awesome!! Thanks for sharing on this month's #ReadySetCraftChallenge!