
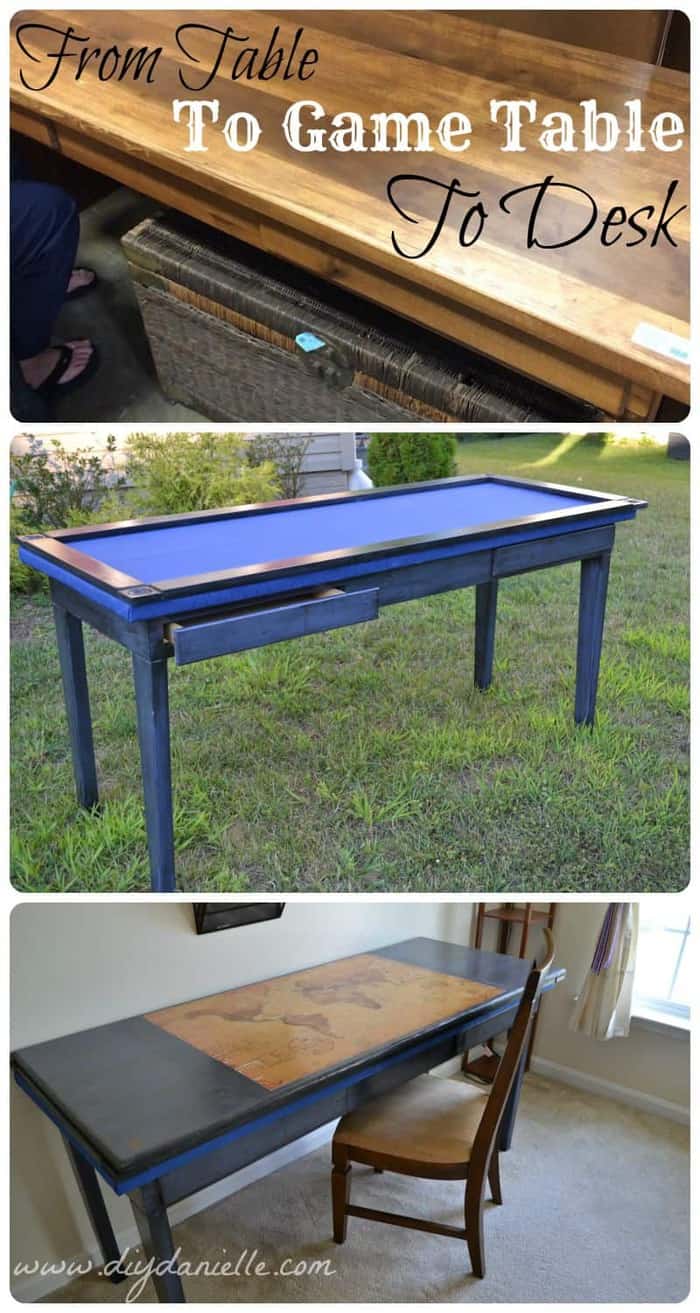

How to repurpose a table into a board game table for cards, board games, and puzzles.This gaming table is perfect because it also can function as a desk.
This post may contain affiliate links which may earn me commissions should you click through them and take certain actions. As an affiliate for Amazon, Cricut, xTool, Home Depot, and other sites, I earn from qualifying purchases. Please DIY carefully. View my full legal disclosures here.
The majority of my content is generated by me, as are 99% of the photos and videos, but I utilize technology for titles, descriptions, video editing out all of my ums, and occasionally for text overlay on images.
Please read the whole post so you don’t miss any important information!
For Father’s Day, I decided to make my husband a gaming table. The problem? I didn’t know where to put it. Then I realized that if I made a top for the table, I could use the gaming table as a desk when it wasn’t in use for games. This has worked so well. If we’re making a puzzle, we can put the top on to play later so no pieces will get lost (we’ve got toddlers sooooooo… things disappear). Similarly, we can leave an unfinished board game for later as well.
Board Game Table Tutorial

Supplies
- Furniture piece to repurpose.
My table was a bit thin… I wish I’d picked a shorter, but wider table because I ended up needing to place the edges off the sides of the table a bit. Otherwise the board games wouldn’t have fit. - A large piece of wood that fits over the top of your table.
The biggest piece of wood we could find (in the quality we wanted) was a bit short for our table, but it works out okay anyways and it’s hard to tell. - Wood for the sides and 4 casing blocks. My wood for the sides was 1x3x8 ($6.88 each at the time) and the blocks were (4x at $1.69 each).
If you can cut and measure well, you could just use the pine boards and skip the casing blocks. It might be easier. I’m new to woodworking so I wanted to keep it simple. - Gaming Felt: I used Stalwart 3 Yards of Suited Waterproof Poker Table Cloth, Royal Blue
This is gaming felt. I was going to just distress the top, but my friend’s husband suggested this instead as it’s the preferred type of material for the top of a gaming table. Apparently it helps keep the cards from sliding around. - Mod Podge CS11245 8-Ounce Glue, Hard Coat (optional)
- Map (optional)
- Felt of some sort to put on the bottom of your table top to keep the top from sliding around.
- Staple gun, nail gun, circular saw, sander, painting and staining equipment.
- Wood Stain
- Polyurethane
Initial Table Prep
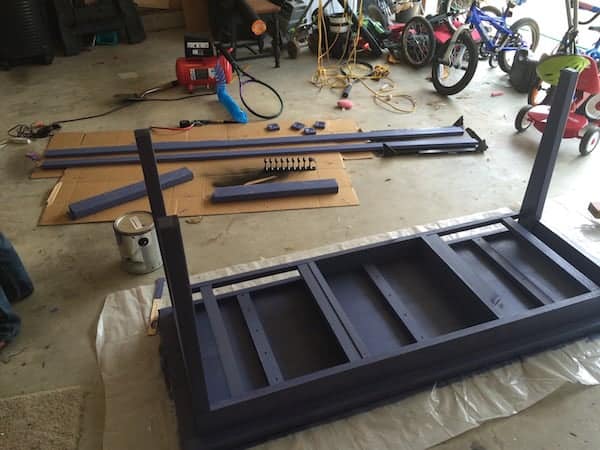
Prior to installing the gaming fabric, I wanted to paint my table. I didn’t need to paint the top of the table because it would be covered with the fabric. As a result, I flipped my table upside down to paint. This allowed me to thoroughly paint (and distress) my bottom… And not miss the underneath of the table.
I also painted my table sides and the casing blocks. You could save some time and paint the top for the desk conversion at the same time
For a full tutorial on how to paint and distress the table, check out my link: Easy Distressing for Wood Furniture: Drab to Dreamy Lego Desk
Installing Gaming Fabric
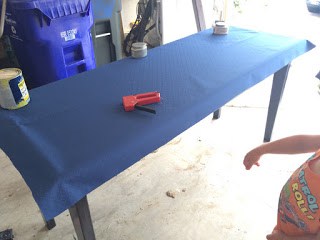
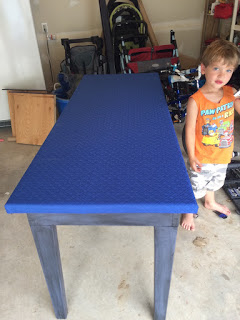
I decided to opt for suited gaming fabric for the top of my table. This needed to be installed before I added the sides. This fabric makes cards easier to pick up and it is resistant to spills. All I did was lay my fabric over the table, cut it a bit bigger than the table top- with enough extra to fold under the top of the table. Then I folded the fabric under the table and stapled. You need to pull this VERY TIGHT while you’re doing it. I think having someone to help would be really helpful, but I did it by myself.
Here are a couple of pictures, before and after for stapling these on (and my helper):
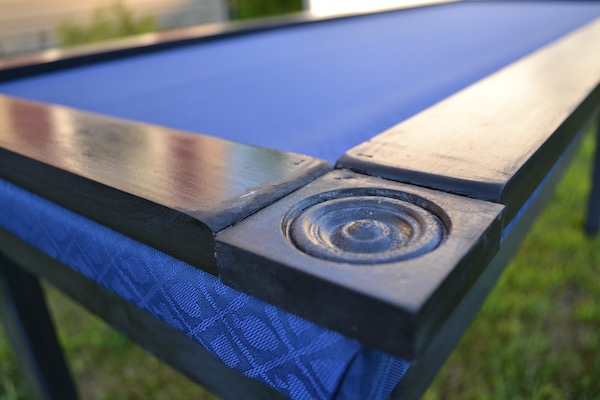
Gaming Table Sides
From what I’m seeing, most of the gaming tables sold have raised sides or a recess. Some sites suggested a 3″ recess, but that seemed like a lot. I wanted my husband to be able to use this with our sons easily and they wouldn’t be able to easily reach over a 3″ lip. I am a very amateur woodworker so I didn’t know if I could cut a good corner. I bought corners instead which was perfect. I measured out my table, subtracted the size of my corners, and figured out the size needed for each board.
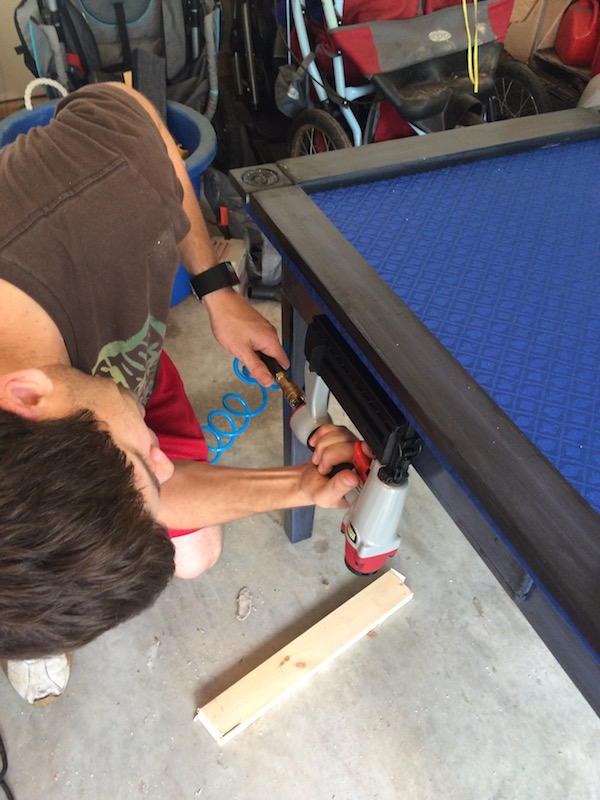
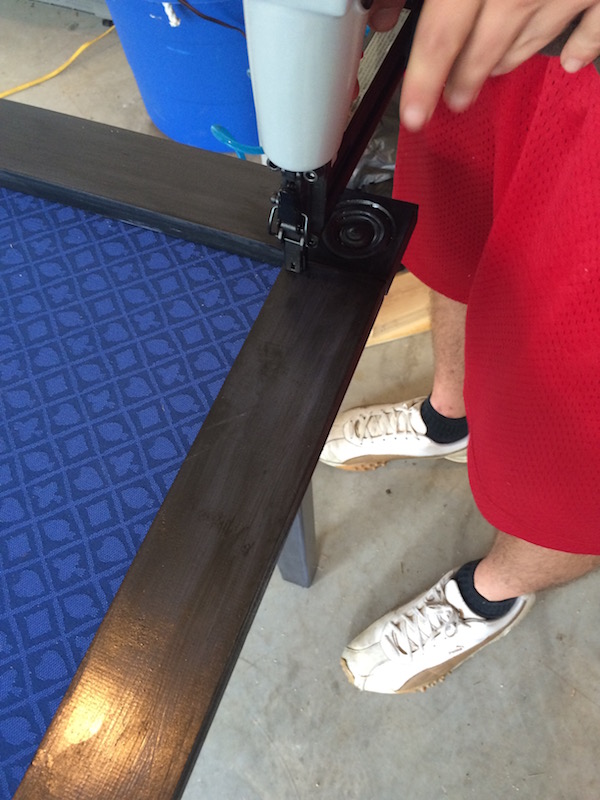
I glued all of these together in a rectangle shape, then glued them onto the table using liquid nails. Total fail. It sort of worked, but we ended up using a nail gun to help stabilize it all. I was originally concerned that the nails would show, but because I distressed the wood it wasn’t even obvious (as you can see in picture on the right).
We stapled some of it from above, such as the corners. But we also were able to staple some of it from underneath the table up. The nails were long enough that they’d go through the board and the table edge.
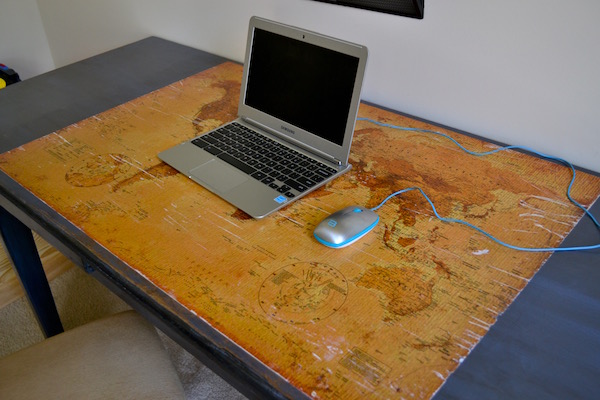
Desk Conversion: Adding a Cover

My original plan was to make this a folding table, but I couldn’t find brackets that would support folding legs on a bigger table. I decided to stick with the original table legs and not complicate things. The problem? Space. Our living room would have space IF our laptop desk wasn’t taking up that area. I decided building a top for this was a great way to use this as a desk normally, while making this easy and available for gaming use.
My husband created a beautiful edge to the top of the table first, then I painted and distressed it.
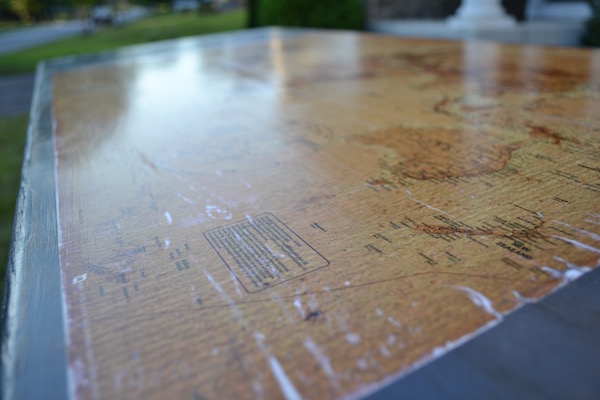
Map (Optional)
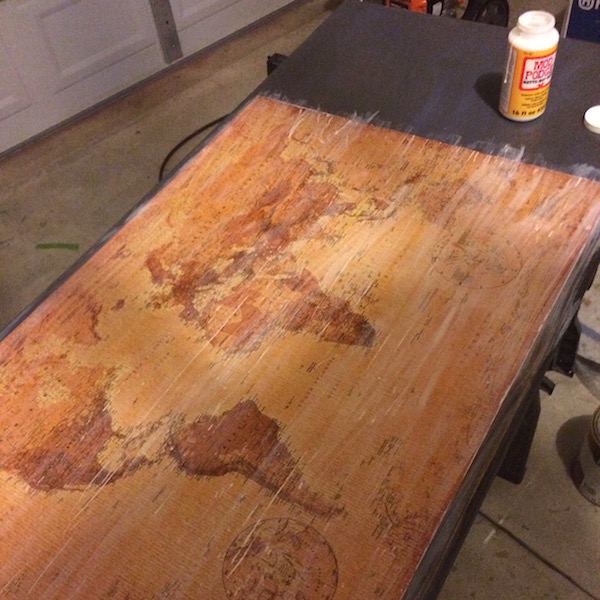
I did end up mod podging a map on top to complete the look. I tried to use polyurethane to put the map on- it did NOT work well. Lots of wrinkles and it didn’t feel glued on.
I ended up using mod podge in the end and polyurethane, but I think this would look better if I’d done mod podge first, then followed up with a coat or three of poly.
To smooth out the wrinkles, I ended up just sanding over them… I was hoping it’d work to create a bit of a distressed map look and not just look like I got lazy and took the easy way out. Which is exactly what I was doing.
Add felt to the bottom of your table top in order to prevent the top from slipping around. I also have a tutorial on how to make card holders from moulding.
Completed Gaming Table and Desk


Here’s a video of the final product too:
Do you love to play games with your kids? Check out these DIY card holders! They make playing games with cards SO much easier.
Please pin and share this post!
Want more gift ideas for dad? Check out Gifts for Grandparents (some of these are perfect for dad too) | Sew him a Bath Apron | Take Cute Pictures of the Kids and Frame for His Office | Get him a digital photo frame | Make him funny boxer briefs | Make him a photo puzzle of the kids
Great tutorial, love the color you chose too!
Thanks!
Lovely idea, nicely done. But where will i find just the right table to give this a go???LOL!
Thanks for the resource for the cloth.
I, too, like your color.
Going out now, to search for a table……….
Thrift store, yard sales, craigslist! I recommend going with a deeper but less long table. 🙂