
How to take an old fabric sling bookshelf, fix it, and update the fabric slings so they have a whole new look, fit to the theme of your nursery.
This post may contain affiliate links which may earn me commissions should you click through them and take certain actions. As an affiliate for Amazon, Cricut, xTool, Home Depot, and other sites, I earn from qualifying purchases. Please DIY carefully. View my full legal disclosures here.
The majority of my content is generated by me, as are 99% of the photos and videos, but I utilize technology for titles, descriptions, video editing out all of my ums, and occasionally for text overlay on images.
Please read the whole post so you don’t miss any important information!
This blog is in no way affiliated or sponsored by Nick Jr., their subsidiaries, or affiliates. The tutorial is intended for personal use only.
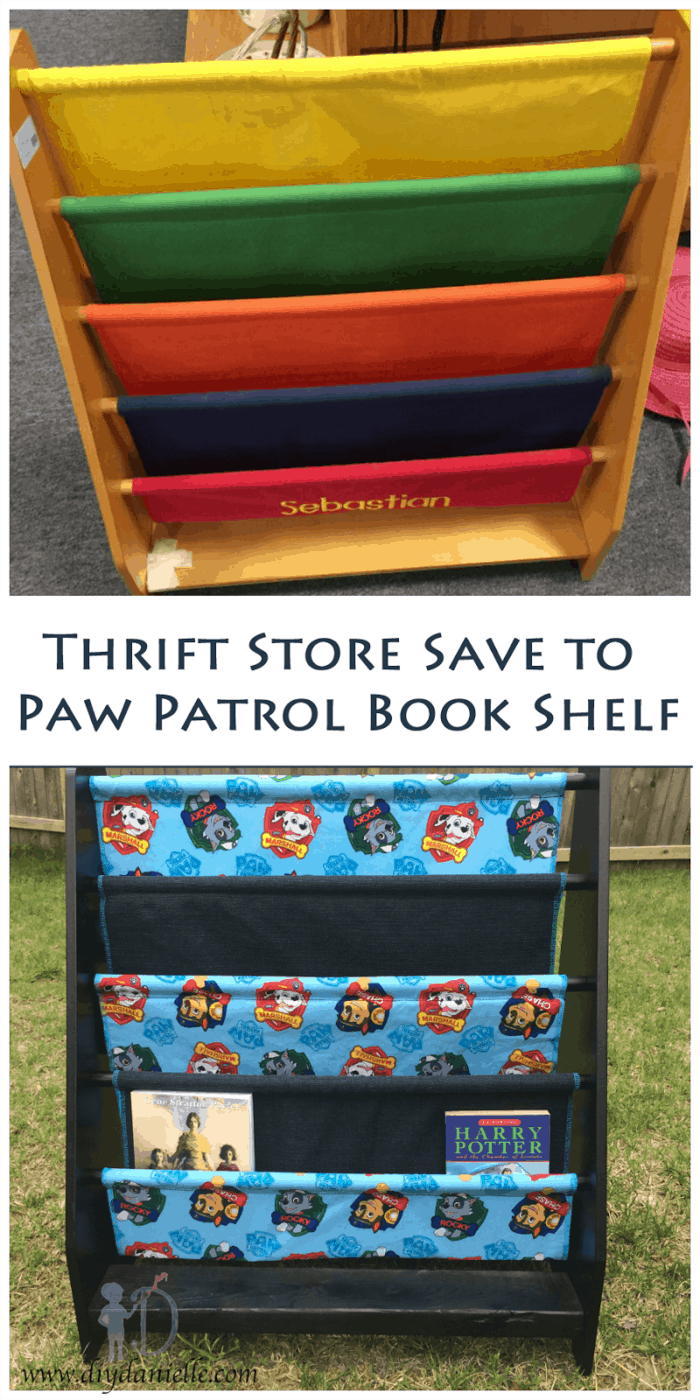
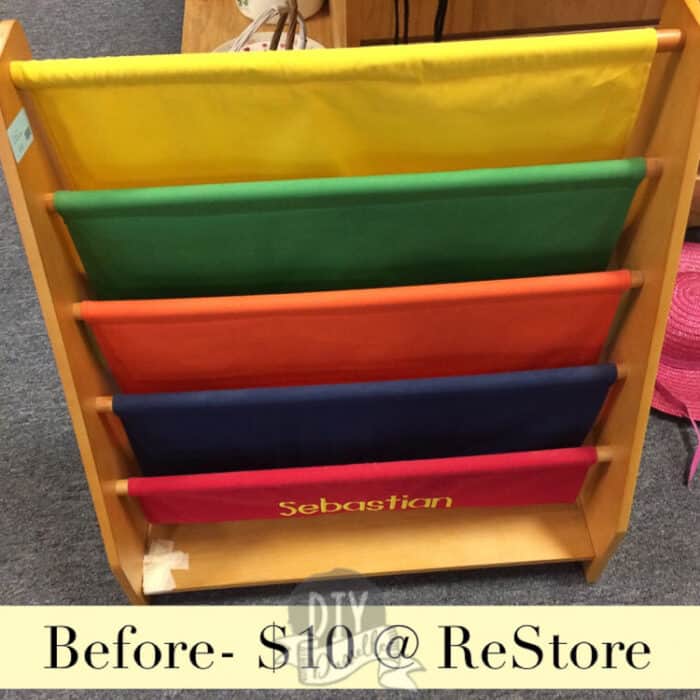
I picked up this Tot Tutors style sling book shelf at Restore for $10, but was frustrated to discover that a big chunk was ripped out of the laminate on the bottom.
And FYI, these are apparently really fun to climb as my kids immediately gravitated towards doing so.
The nice thing about reusing the old shelf, despite the issues repairing it, is that it helps prevent mostly functional items from going into the garbage.
Fixing items is almost always ideal if you have the skills to do so.
I am updating this post as of 1/28/2020. The post was written originally in April 2015. I recently had to take the book rack outside to fix it again- so I decided to update the photos and some of the information.
Replacing the Dowels
When I fixed this again in 2020, it was because two of the dowels had broken. I started by removing the broken dowels.
I used the broken ones and cut two new dowels to the right width. The old dowels used a special screw system. While I could have potentially reused those pieces, I decided to keep it simple.
It was easier to pre-drill a hole in each end of the dowel, then use a regular screw to hold the dowels in place. This will make it a bit more difficult to remove the slings to replace them, but this wasn’t really a huge issue for me.
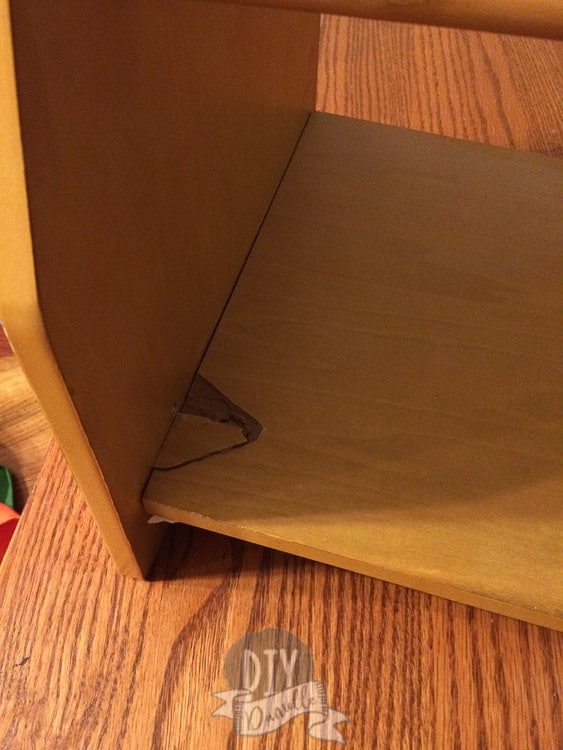
Repairing the Broken Bottom Shelf
To fix the bottom, I decided that replacing the bottom was best. This is the original issue….
I had some scrap 2x4s in my garage that fit perfectly.
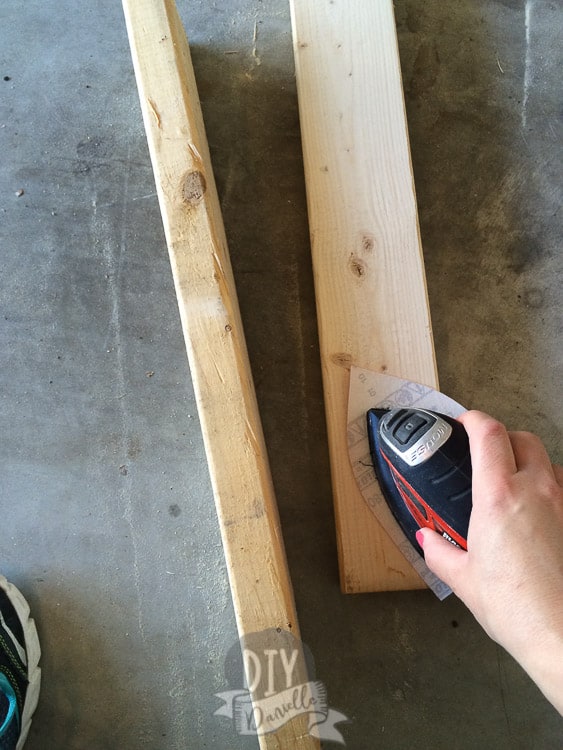
I sanded the two wood braces.
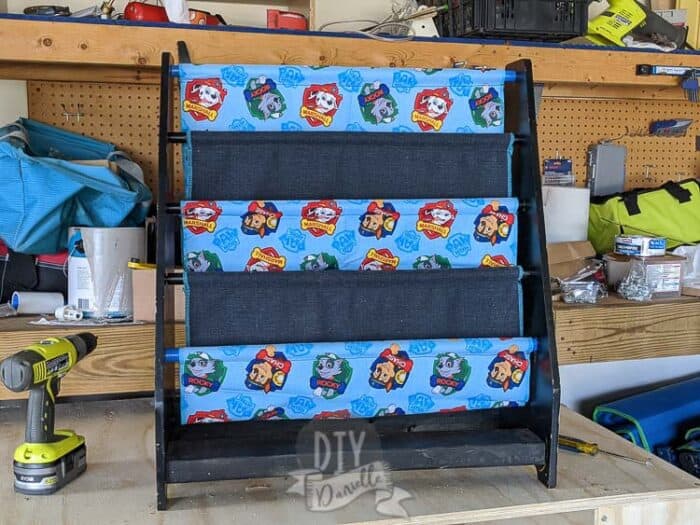
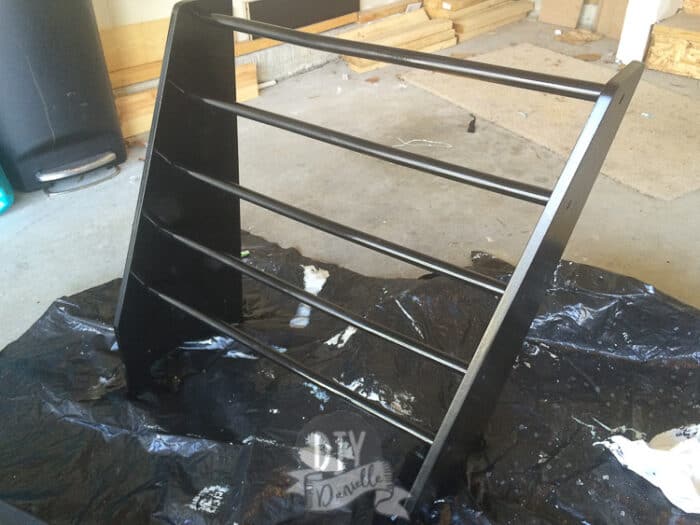
After I spray painted the 2x4s and shelf black with Rustoleum Painters Touch 2x Ultra Cover Paint and Primer..
I screwed the 2x4s onto the bottom using 1 1/4″ screws, in place of the laminate board that was there before.
The wood added stability to the shelf. I recommend priming the 2x4s before painting them. As you can see, they absorbed some of the spray paint because I skipped this step.
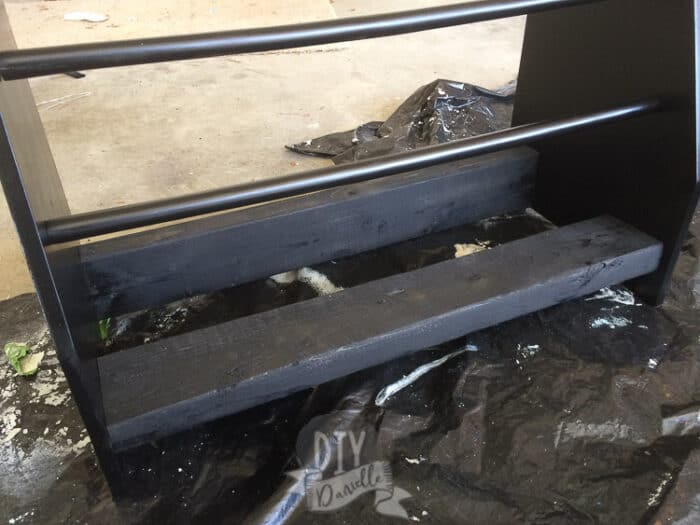
Once I screwed on the wood, I touched up with the spray paint, making sure to get the areas where the screws were.
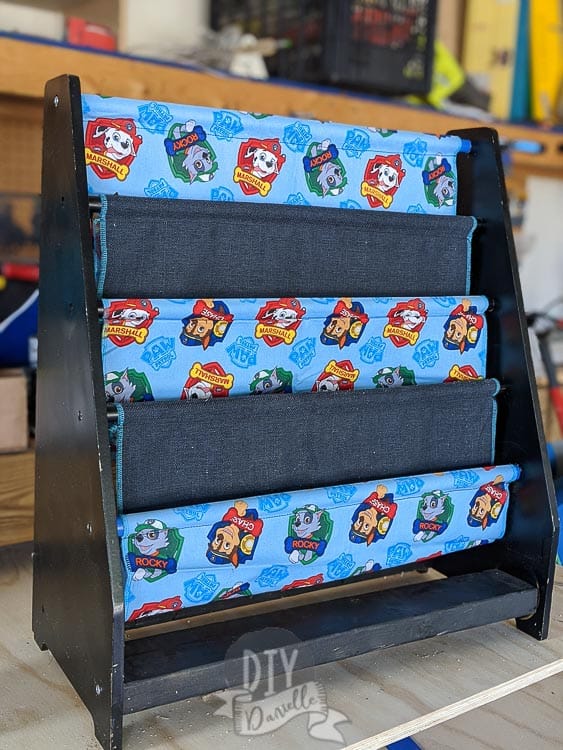
Sewing New Slings for an Old Book Rack
This is the difficult part of the job. Now I needed to make some replacement book slings.
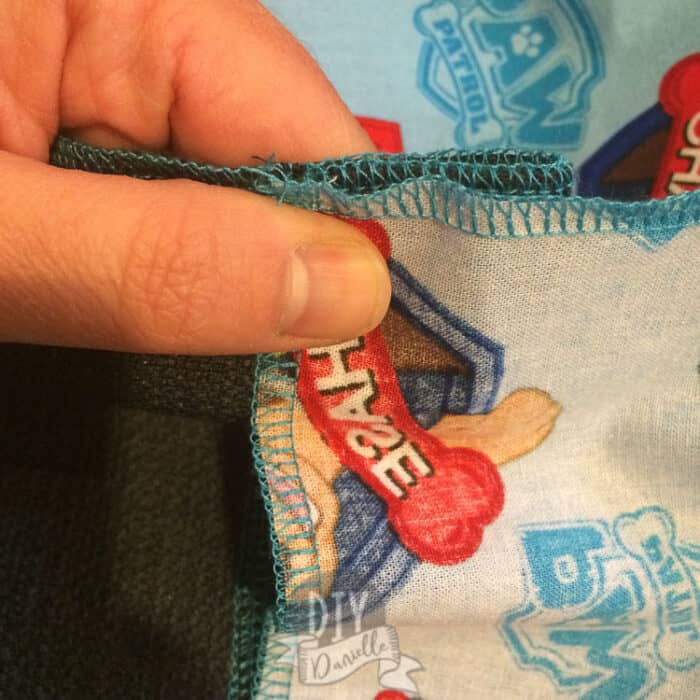
These said Sebastian. I hate personalized stuff because embroidery isn’t possible to remove and it makes items hard to sell. This meant I needed to craft new slings, cover up the name, or just ignore it.
Obviously I don’t ignore this stuff. It’s too much fun to fix.
I’m going to type some instructions out below, but you’ll also find instructions in the video below… this video is all closed captions with some classical music in the background so if you need to turn off the volume, you’ll be okay doing so!
The panels were interesting.
The “Sebastian” panel was in the opposite direction than the rest… So it became pretty clear that I couldn’t just do one cut of fabric and be done.
I needed to do each panel separately.
If I’d been smart, I could have made these two layers and not needed to worry about the directionality of anything. If I’d done it this way, I would have measured the full length and width, added a 1/2 seam allowance to each side, cut the Paw Patrol fabric this size, then the blue fabric this size. I would have sewn them right sides together, left a gap to turn, iron, and top stitch. Then I could have sewn my pockets for the dowels. Ugh. This would have been SO MUCH EASIER!
I decided to serge my sides rather than sew them. It would be faster and hey- my serger thread and fabric matched today. As a result, I didn’t add much of a seam allowance. I realized after that I probably should have given myself more wiggle room for measurements, but it did work out fine.
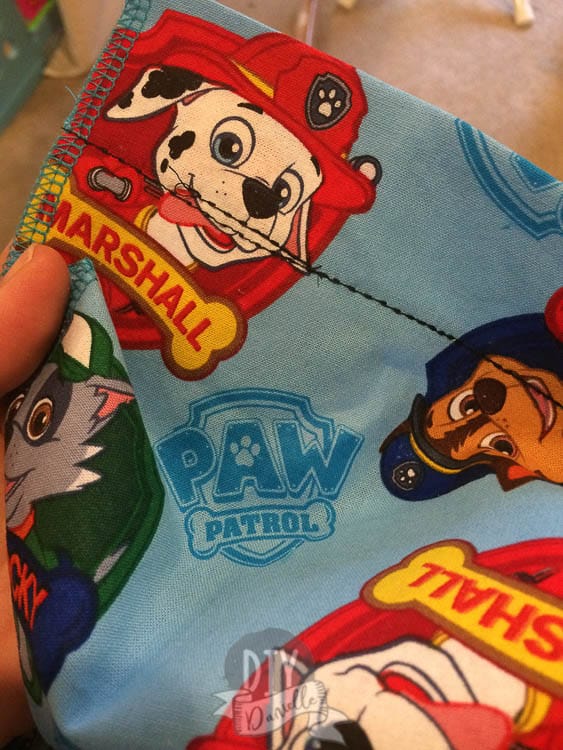
Here’s how I figured each panel out. I looked at my original slings and measured, making sure to measure from the top to bottom of each panel (there was some overlap where they were sewed together).
For example, the width of the “Sebastian” panel was 22.5″ so I cut my fabric 23″ wide. The panel was 10″ tall, plus I needed about 1.5″ to turn over for the dowel. Total is 11.5″ tall.
You could take apart the slings to create a template for your project if you wanted, but take photos because it’s nice to have those to look at when you’re putting the new slings back together.
I alternated plain (PL) and Paw Patrol (PP) fabric for the other panels. You may want to measure your own slings if you decide to follow this and add additional seam allowance if you plan to turn edges over to finish the edges instead of serging.
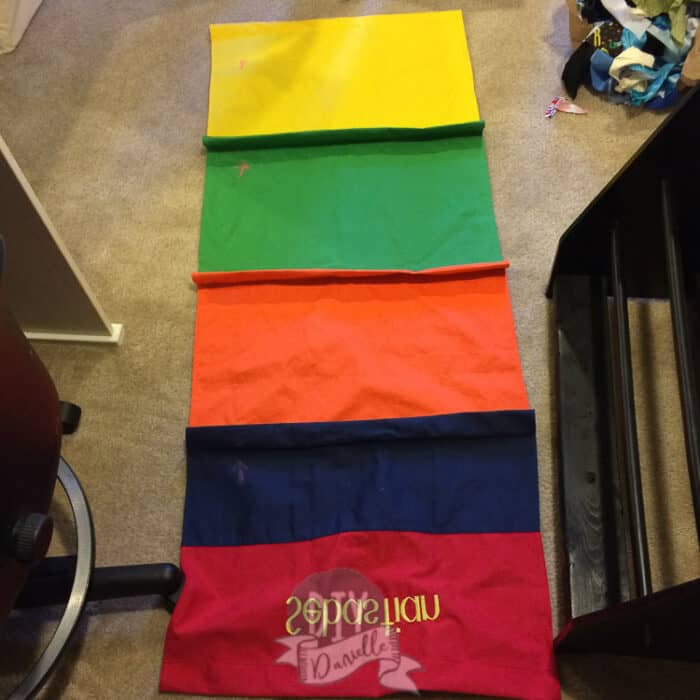
First cut: 23″w x 11.5″h (PP)
2nd panel- 23″w x 9″h (PL)
3rd panel- 23″w x 16″h (PP)
4th panel- 23″w x 16″h (PL)
5th panel- 23″w x 17.5″ h (PP)
Cut fabric.

Serge each piece of fabric.
Iron over 1.5″ on each panel and/or pin for the rod.
Sew rod pocket. I used a sturdier stitch on my machine seeing the pockets will be holding a lot of weight with the books on them.
Sewing the pockets together is the trickiest part. I’m hoping that I can explain properly. I had difficulty figuring out how to sew all the pockets together. Lay down your original sling. Lay the pockets in the correct order and direction on top of it. This was helpful for me to get an idea of how they’d sew together.
The “Sebastian” pocket doesn’t sew to the other pieces the same as all the other panels sew together- those first two panels are the easiest to sew together. Oh- don’t forget- the Sebastian pocket is facing the opposite side down from the rest of the pieces.
Once I got the Sebastian panel and the second panel sewn together, I put those back down and went to the 4th/5th panels. All of other my panels were right sides down (meaning the Sebastian panel is right sides up on the other end). As you can see below, my 4th panel pocket is underneath and the 5th panel non-pocket edge is over it.
All I did was sew them together along the SAME line that the pocket was sewn together (yes, so they’re overlapping). Again, I used a good reinforcing stitch for this part. This was how all the other panels were done as well. You’ve got to look at each one to make sure you’re coming the correct sides together. I combined 4th/5th, then then 3rd/4th, then the 2nd/3rd (2nd already had Sebastian panel attached).
Once you do that, you’re done. It’s not super difficult once you figure it out, but you need to get it correct or your fabrics will be facing the wrong direction so it was a bit time consuming.
Here are some finished pictures of my book shelf!
You May Like: Sew a Paw Patrol inspired Ryder Vest for the PERFECT Toddler Coat
Please share and pin this post! You can also post your project and tag the DIYDanielle team on Instagram @doityourselfdanielle!
What a darling makeover. My toddler is OBSESSED with Paw Patrol.. he would love this!
If he loves Paw Patrol, check out this Halloween costume that I made last year: https://diydanielle.com/2014/10/pawpatrolcostume.html. My son is 3 and reallllllly doesn't like dressing up in costumes so I made him a Ryder vest. Thinking this year I'll make the dog a costume to go with it, haha.
This turned out really great! I love those book slings–I need to find myself one to fix up!
What an amazing job you did on that. I love a good repurpose/upcycle! It looks fabulous!
Such a cute idea!
Your video is great. I need to find something like that to make the grands books more accessible to them. Glad to see you at the Bound by Books link up. For what it's worth, jeannie