
How to sew Easter baskets for kids. These tall baskets hold a lot and keep eggs from falling out!
This post may contain affiliate links which may earn me commissions should you click through them and take certain actions. As an affiliate for Amazon, Cricut, xTool, Home Depot, and other sites, I earn from qualifying purchases. Please DIY carefully. View my full legal disclosures here.
Please read the whole post so you don’t miss any important information!
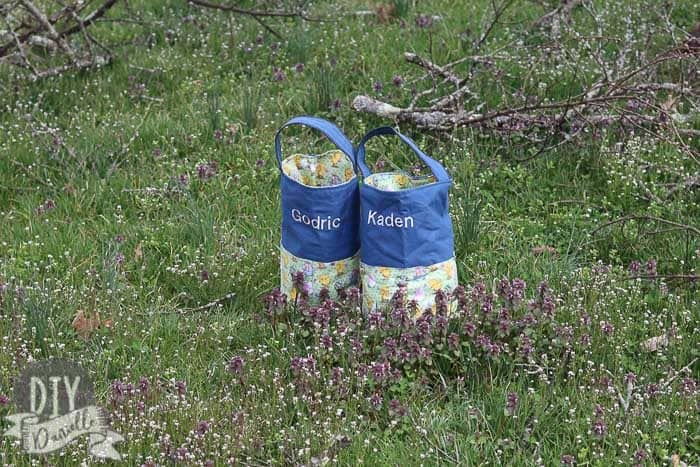
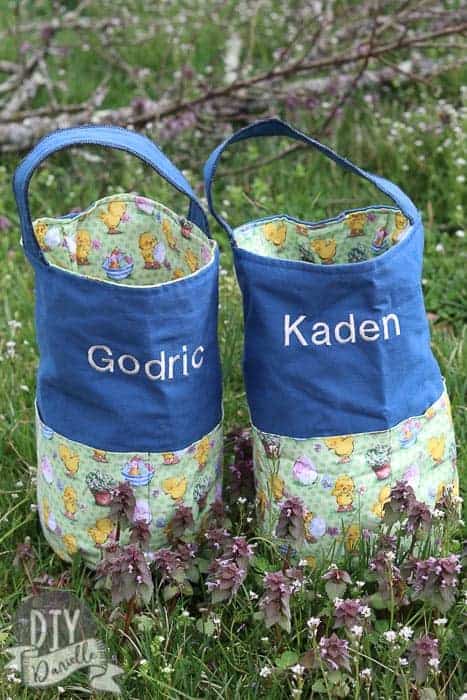
When my two older sons were young, I wanted to use my embroidery machine to make them custom Easter baskets… something they could reuse every year. Every year we dig these out to enjoy and we have fond memories of little boys dragging these along. Now the boys have grown into them, but they still are perfect for our yearly Easter egg hunts. These were super easy to make and the fabric has held up really well over the years. I love that we aren’t using “throwaway” baskets or baskets that break easily.
These bags worked out well as they are pretty tall and I like how sturdy the interfacing makes them. They’re tall enough to hold a Jenga game, just to give you an idea how tall the bag is. You could scale the height down if you prefer.
When I first made these, I learned how to make them by watching a free Bag Making Basics class on Craftsy. Craftsy was recently bought out by BluPrint, but the good news is that this class still appears to be available free on the site.
Use the Discount Code DIYDANIELLE on cricut.com for 10% off any cutting machine or heatpress (no minimum). Excludes: materials/accessories/mystery boxes/etc. Applies to US/CA only, code expires 12/31/23.
I’ll give you a few suggestions on how I tailored this project for use as an Easter basket instead of a normal bucket bag.
- Tutorial on BluPrint: Bag Making Basics Bucket Bag
- Easter Fabric
- Coordinating Fabric
- Sewing supplies
- Embroidery machine, hand embroidered, or use heat transfer with your Cricut Air 2 or Cricut Maker!
Tips for Making a Tall Easter Basket
Okay… Let me explain the alternations I made to the original tutorial.
Stabilizer
I did not add stabilizer to the pockets because I didn’t have enough and I don’t think it’s completely necessary.
I didn’t have enough of the right type of stabilizer so I did use a couple different kinds- one wasn’t iron on so I just basted it on first. I don’t think it looks as good as the other bag as a result… but can you guess which is which? Probably not. It’s a heck of a lot easier to use the iron on though.
Making the Handle
I also ended up just making the handles with my serger… I just like my serger too much not to try to use it every chance I get and it saves me the effort of turning and top stitching a lot tube. I HATE sewing handles.
Customizing the Easter Basket
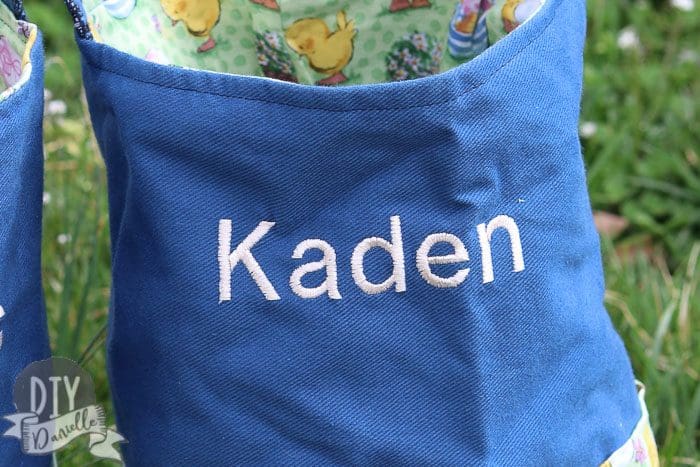
I embroidered the front at the beginning with the boys’ names. I LOVE how this looks. At the time, I owned a Brother PE-770, an affordable embroidery machine. I think the model was replaced with the Brother PE800.
Since the time I made these, I have actually sold the machine because I didn’t feel that I used the embroidery machine enough to justify storing it. My sewing room is pretty tight these days. I can borrow the Brother SE600 from our library if I’m feeling desperate.
I do, however, love using heat transfer vinyl for customizing items. I’ve started to lean towards using it to customize items rather than embroidery.
Here’s why: I hate seeing things get thrown away. It’s such a waste to have something end up in a landfill. Heat transfer vinyl can be removed and the bag can be used for someone else. I haven’t found a way to easily remove embroidery without destroying the fabric underneath. I’m not sure if there’d be fading (so the design still shows) when removing HTV after having it on there a long time. But I KNOW I can’t fix embroidery.
This is particularly relevant because I know no one else who has a child named Godric to pass our things down to!
A Note on Fabric Choices
As you can see below, I used the Easter fabric for the liner and exterior pockets.
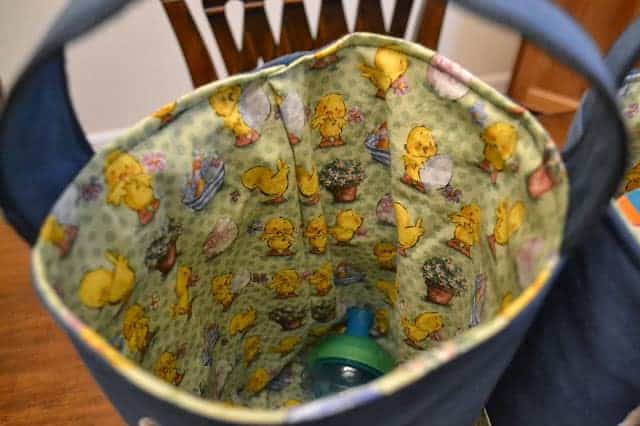
This was strategic. Embroidery or heat transfer doesn’t show up as nicely on patterned fabric, in my opinion.

Have you tried Bluprint yet?
I haven’t tried Bluprint yet, but it looks like the setup is very similar to Craftsy where you get lots of video and photo tutorials for different types of skills- sewing, knitting, crochet, woodworking, etc. Unlike the old format on Craftsy where you paid per class, Bluprint is a yearly or monthly fee where you get up to one class per month.
This is similar to Audible’s subscription program where you get 1 audio book per month of the subscription. You get the reduce rate for the items and you “own” the items forever (electronically) so if you don’t watch/listen to them in time, they’ll still be there for you later.
Make sure to click here to get 50% off your first three months.

If you love this, you might love my customized Tooth Fairy Pillows that I made for the boys too!
Please pin this post or share it!
This post was originally published April 3, 2014 and it was updated April 7, 2019 with new photos and information. As you can see, the bags still look fabulous!