
How to sew some easy baby blankets to help match your nursery theme.
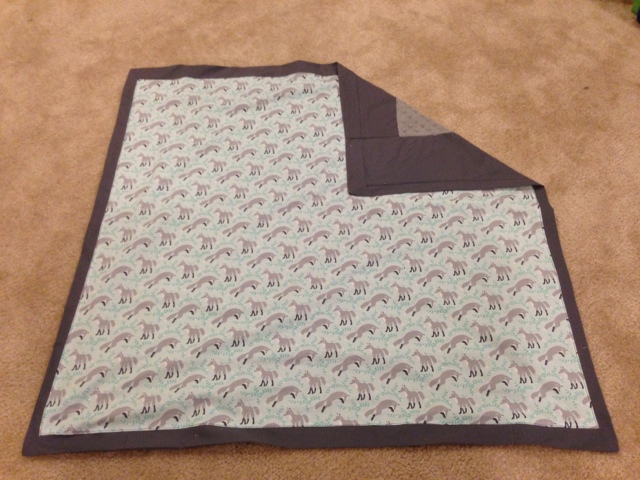
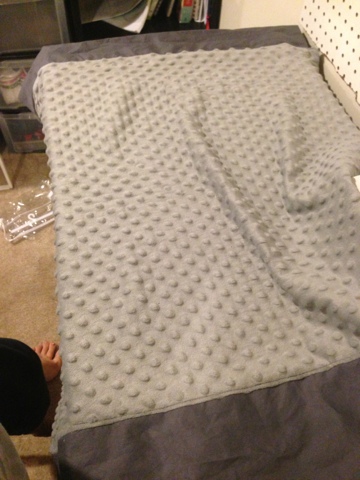
As part of the nursery set, I put together a couple blankets for the boys. For G, I made a toddler sized blanket that is 40 x 60″.
It’s got the fox fabric for the front and the gray minky for the back. It was pretty simple. I’m outlining the process below under “Simply Soft Baby Blanket.”
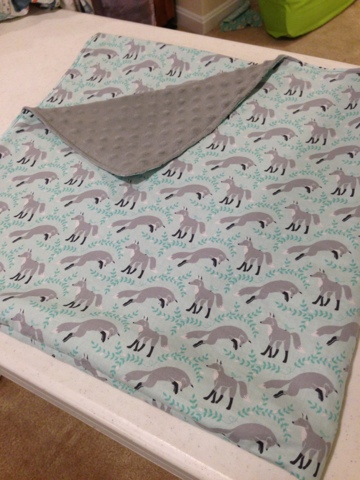
For Kaden, I made a much smaller blanket at 39 x 39″. I really liked this tutorial from Sew Much Ado about self binding receiving blankets so I used it to make Kaden’s blanket. I’ll put some pictures of the process below, as well as info on the one change I made under the “self binding receiving blanket.”
Simply Soft Baby Blanket
1. Cut out the fabric in the size you desire. Make sure you add a little extra for seam allowance. Pin. then sew right sides together, leaving a fist-sized opening to turn the fabric right sides out.

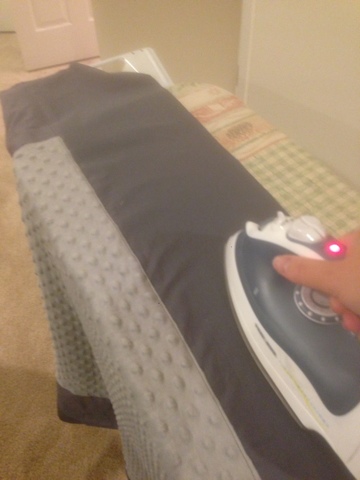
2. Turn fabric right sides out. Iron.


3. Top Stitch, closing up the opening you turned the fabric through.

Final product!
 |
| 40″ x 60″ Blanket for Baby G (toddler/crib size). In this picture it’s folded up so you can’t see the true size. |
The Self Binding Receiving Blanket
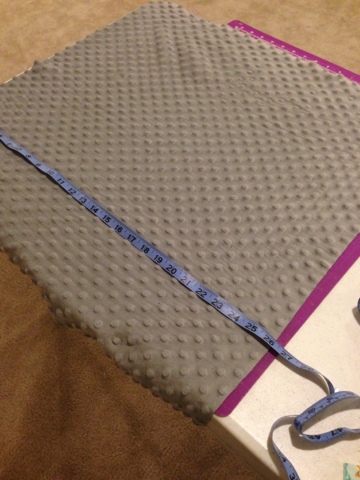
I followed the tutorial pretty carefully, but I didn’t have the right amount of material for the size blanket I wanted so I did add material to the back fabric so I could make the blanket. I used gray minky in the back middle of the blanket, then surrounded it with the gray cotton I had leftover from the curtains.
My fabric was cut as follows:
- Gray Minky: 26×26″
- Strips of Gray Cotton:
- 8×26″ (2)
- 8×42″ (2)
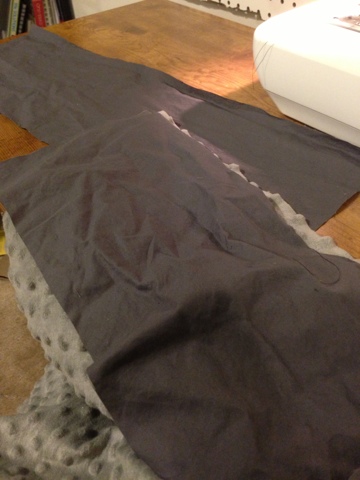

I sewed the gray cotton, right sides together with the minky, along the right and left sides starting with the 8×26″ pieces first. Then I sewed the 8×42″ gray cotton pieces to the top and bottom sides; you’re sewing them to the side pieces of gray cotton as well which is why the pieces are longer.
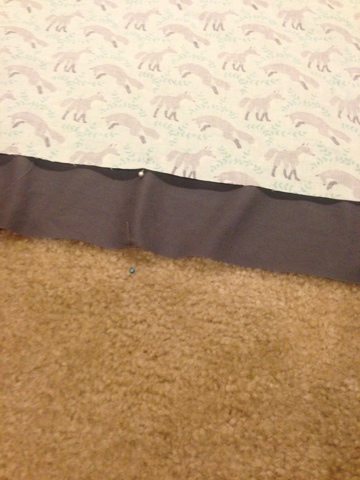
The back piece laid out with the top piece of fox fabric:


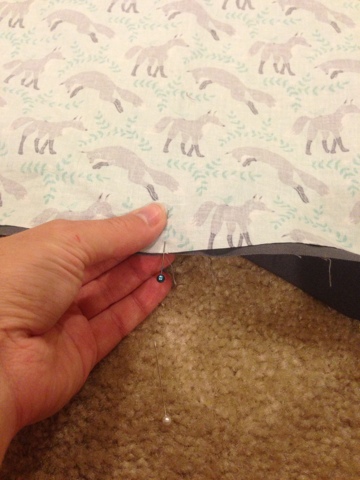
Iron the cotton and then lay out your fabric as described in the tutorial and pin, sew, etc. as directed. When the tutorial tells you to fold the fabrics in quarters, look at my picture below to the right.
What you’re doing is basically marking where the exact mid point is on each fabric. That way you can make sure your front fabric is perfectly centered on the back fabric, right sides together, for the next part.
Here’s my fabric, laying down the back fabric right sides up and the front fabric right sides down. Center the front fabric using the pins to line everything up.

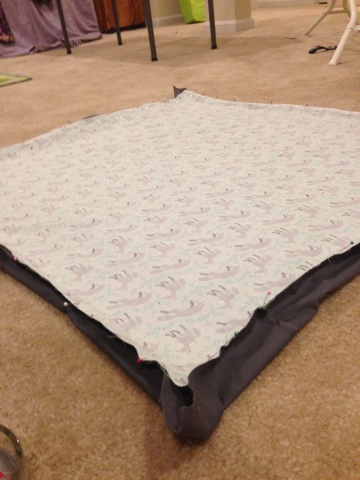

As stated in the tutorial, you need to start in the middle of each side and work towards the outside, pinning the front and back fabrics together. This is confusing, but once you do it it’ll make more sense.
I didn’t take pictures of the rest, but I continued to follow the tutorial. One thing I messed up was that I ironed the fabric once I turned it right sides out, but didn’t iron the cotton on the back.
When I went to topstitch everything, the back isn’t as smooth as I’d like. Oh well, next time! I’m really happy with how it turned out and I don’t imagine Kaden will be a critic.

Final Product!
 |
| This is my pile of stuff I’ve made for the nursery so far, excluding the curtains which I hung up. |
DIYDanielle
Thursday 18th of July 2013
Thanks! I think the Michael Miller is on sale (15% off) on Fabric.com until 7-22-13. It sort of hurts that it went on sale right after I bought a ton though, ha. ;)
dressthisnest
Thursday 18th of July 2013
I love your fabric choice!