

It’s hard to buy gifts for all my moms from long distance. I’d love to just take them out to a wonderful Mother’s Day brunch or have Mother-Daughter day out at the spa, bring them flowers or breakfast in bed. But most years, I’m not nearby for the holiday. It’s also difficult because I can’t spy on them to see what they have or need. And they generally have everything that they need. They’re almost as difficult to shop for as my dad… but not.
This year I’m a little excited at the prospect of making them each their own personalized gift. It’s sort of like being a little kid again, except I’m going to sew them something that they will [hopefully] be able to use. Yay!
This blog will be in two separate posts because my first gift completed is an item that I haven’t seen a tutorial for yet so my post will be a major photo bomb. You may want to review the care instructions at the bottom of this blog before beginning as prepping the chalkboard cloth prior might be helpful.
Fabric Chalkboard Table Runner
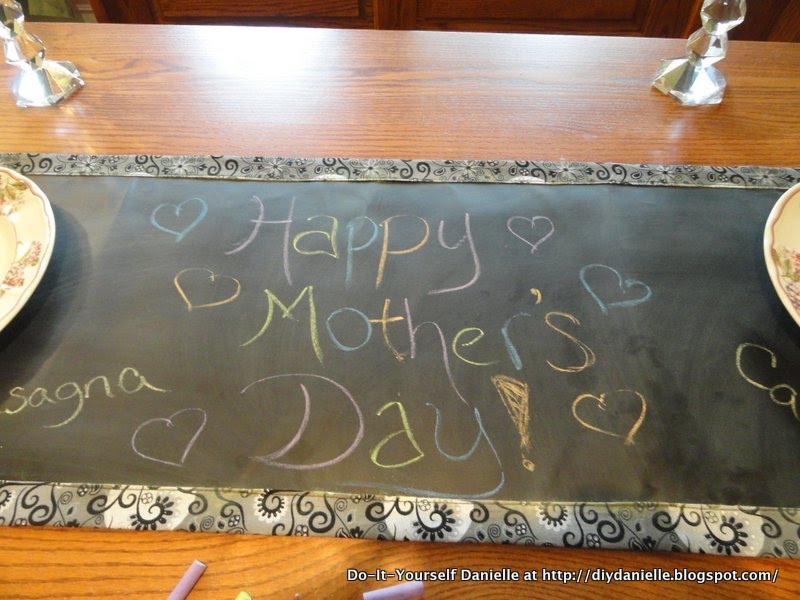
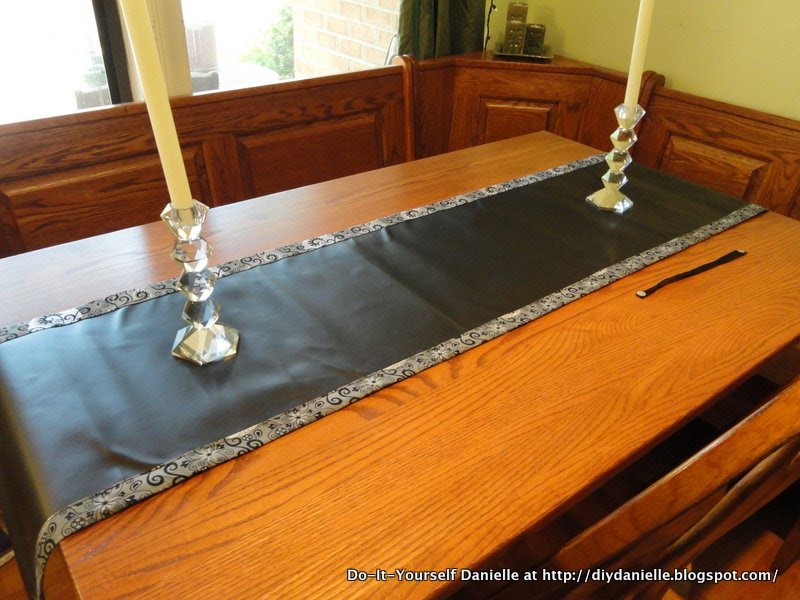
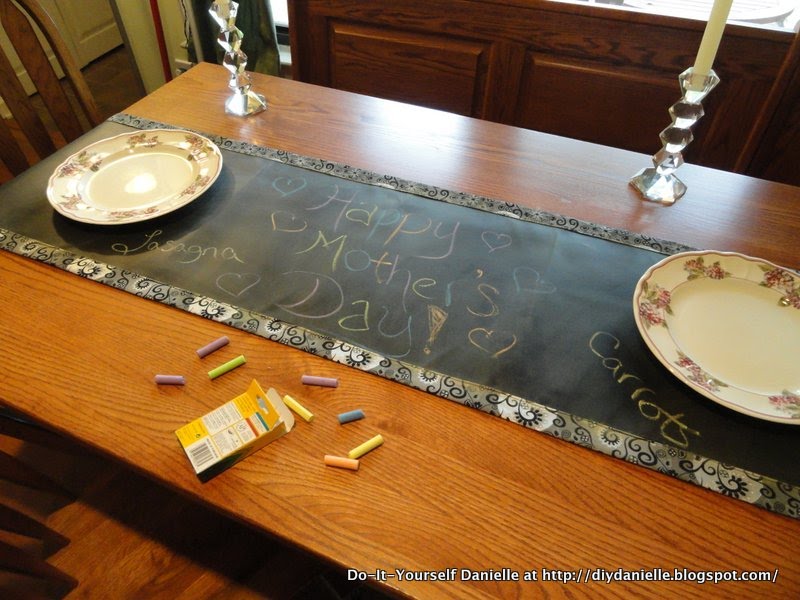
My stepmother is always throwing what she might call a “small” party (20-50 people is “small”) and she cooks all these different meals. I keep seeing these great chalkboard table runners on pinterest and decided to make one for her. I think she’ll like being able to scribble each meal out on it with chalk. I love how it came out… I totally want to make one for everyone I know, but I don’t know that anyone else would use them! These would be great to keep kids occupied at dinner though. You could even just do placemats which would be a LOT easier to sew.
Materials:
- Chalk (for prepping the cloth)
- Chalkboard fabric
- Fabric for the back
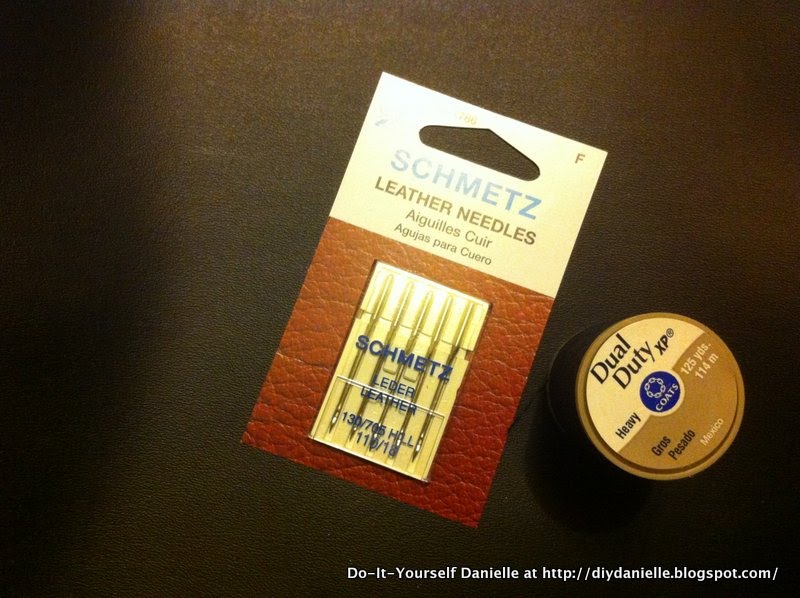
- Matching thread (I used heavy thread)
- Some good needles- I used needles for leather.
- Paperclips!
- Iron, sewing machine, etc.
 |
| Gather all of your materials- I was guestimating how long my stepmom’s table and breakfast bar is. I think my fabric was roughly 9′ long and my chalkboard fabric was 15″ wide. I had to cut the chalkboard fabric shorter than the coordinating fabric of course, so that I could make an edge to fold over. |
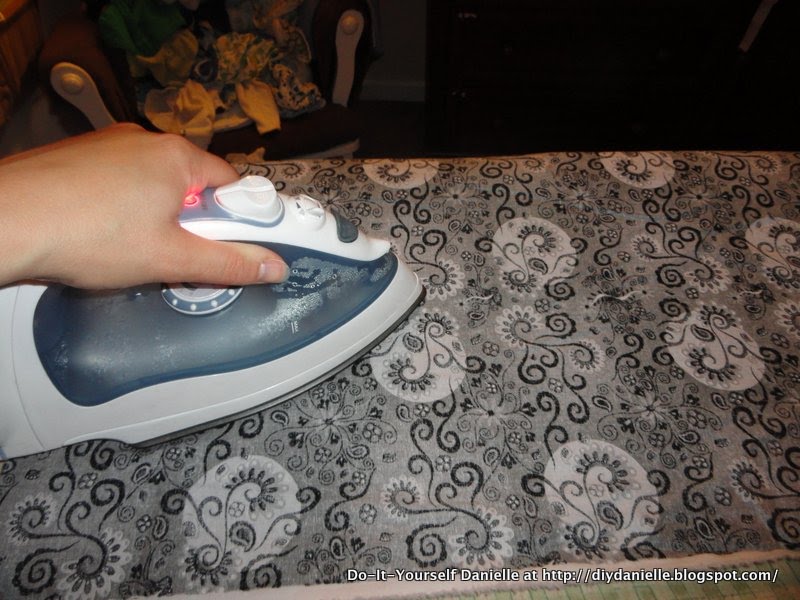 |
| Iron your coordinating fabric |
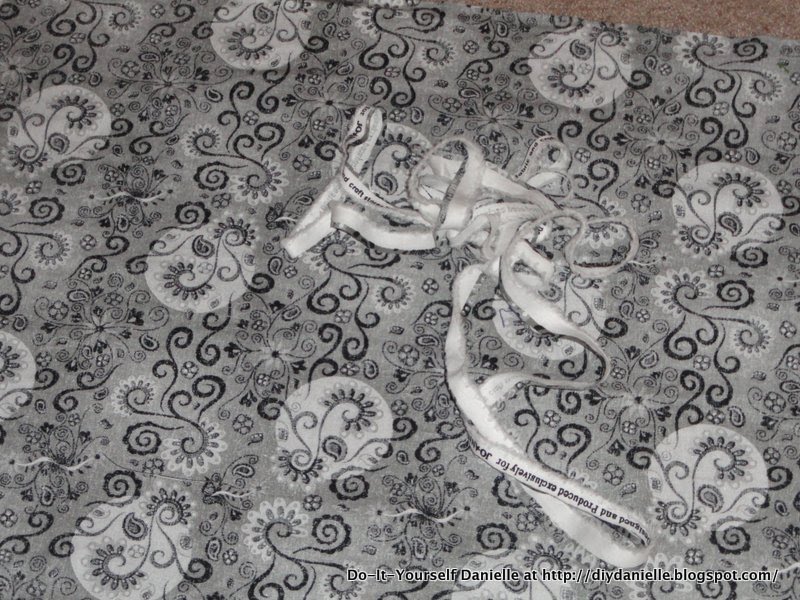 |
| Remove your selvedge edges (not sure how that’s spelled) |
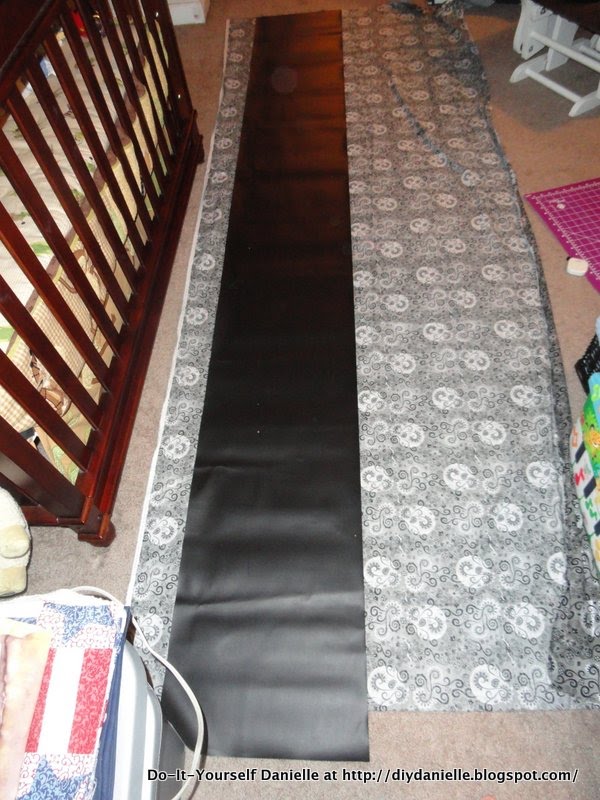 |
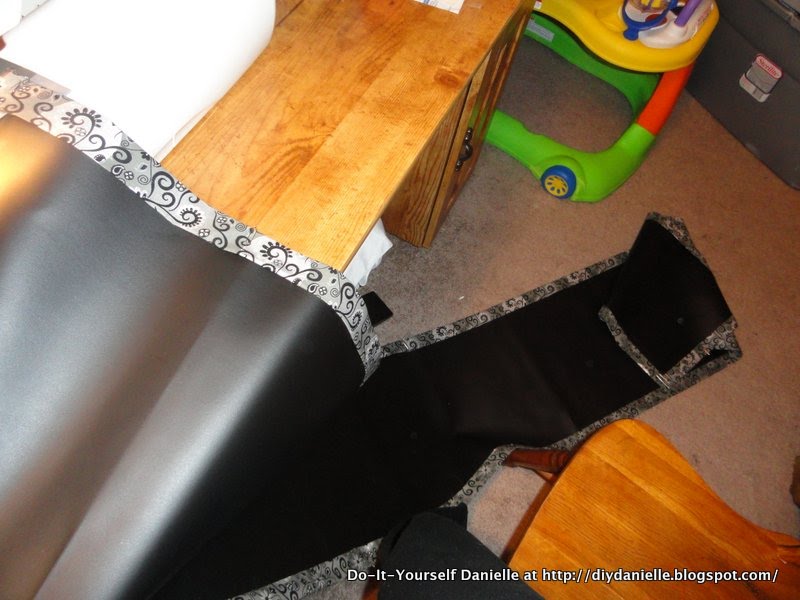
| Lay out your fabrics with your chalkboard cloth on top of the coordinating fabric. My chalkboard fabric ended up being much longer than the coordinating fabric so I had to trim it. |
 |
| What I did was figure out how much of an edge I wanted and then figure out how much to add to the width of the coordinating fabric. My edges ended up being about 1″ wide and I just added 2″ of fabric to each side to account for folding it over (tucking the raw edge inside). This totaled a width of 19″ on the coordinating fabric. I also added 2″ of fabric to each end of length (or rather, cut my chalkboard fabric 4″ shorter). |
 |
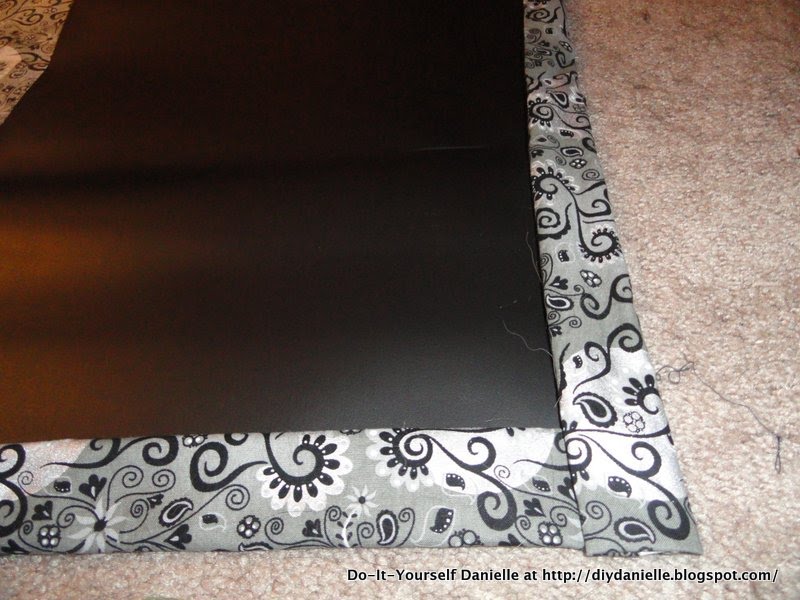
| Okay so what I did was iron the edges how I want them, then I used paperclips to hold them in place. I didn’t feel like regular pins would work here and paperclips did the trick. I am not absolutely certain that ironing the edges with the chalkboard fabric under it was a great idea so I went VERY carefully, didn’t press too hard, and tried to avoid directly touching the chalkboard fabric with my iron. I did this all on the floor, on top of the cutting mat. I’m pretty certain I made all sorts of bad decisions here, but besides a few burns (on my toes, lol) it all worked out. I don’t necessarily recommend doing it the same way I did. Tread carefully or you might ruin… something. |
 |
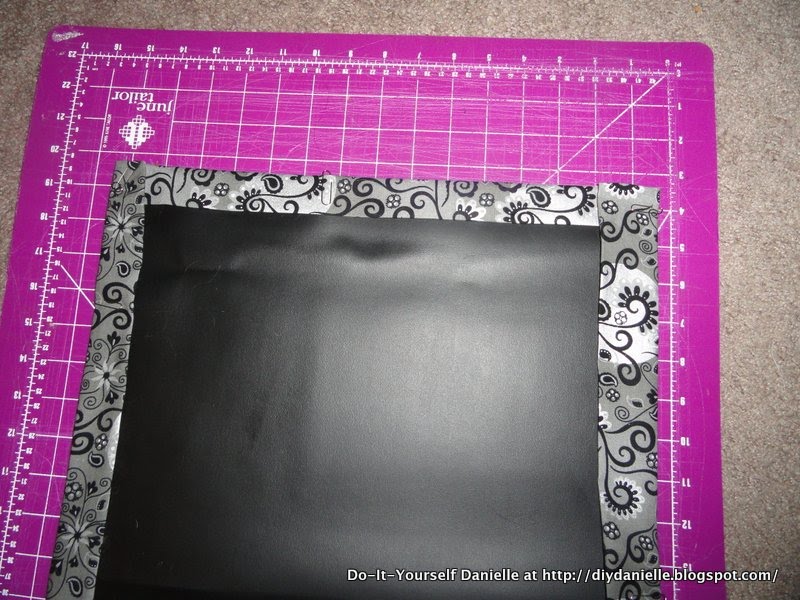
| This is my fabric, all paper clipped in place and ready for the sewing machine. |
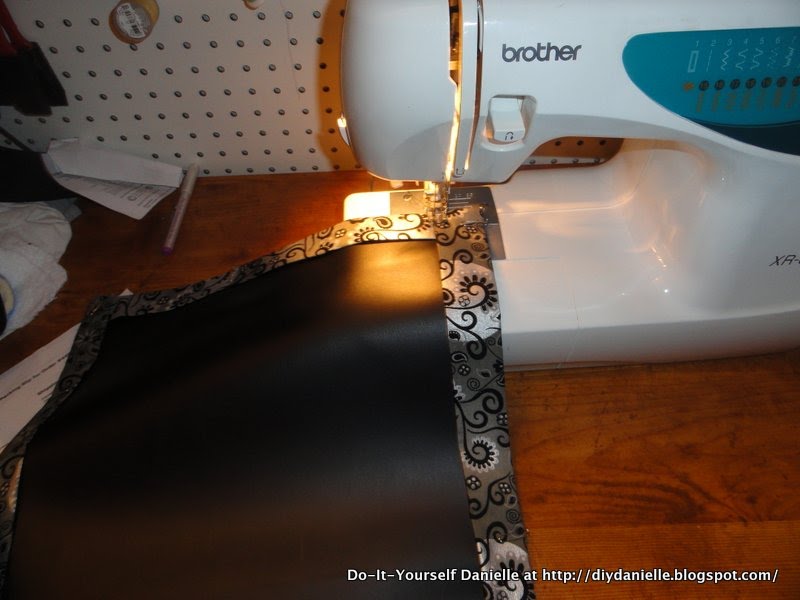
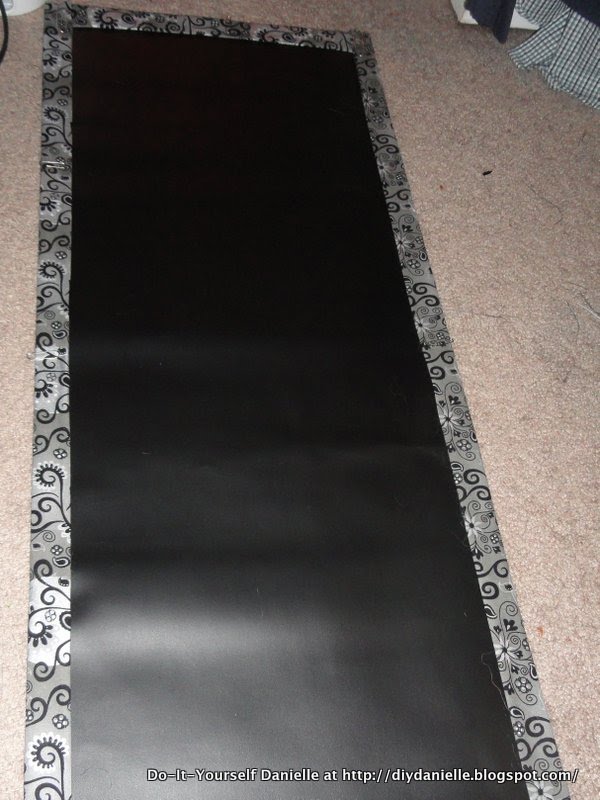
As you can see, sewing this much fabric is difficult. It requires way more space that I had. Make sure that you replace your machine needle with a heavy duty needle. I used one appropriate for leather and that worked well for me. A regular needle may break going through the chalkboard fabric. I didn’t want to chance it. Because I didn’t have enough space, I just made sure to roll the fabric on the other side of the machine as I completed sewing it so it wouldn’t block what I was currently sewing from feeding through correctly.
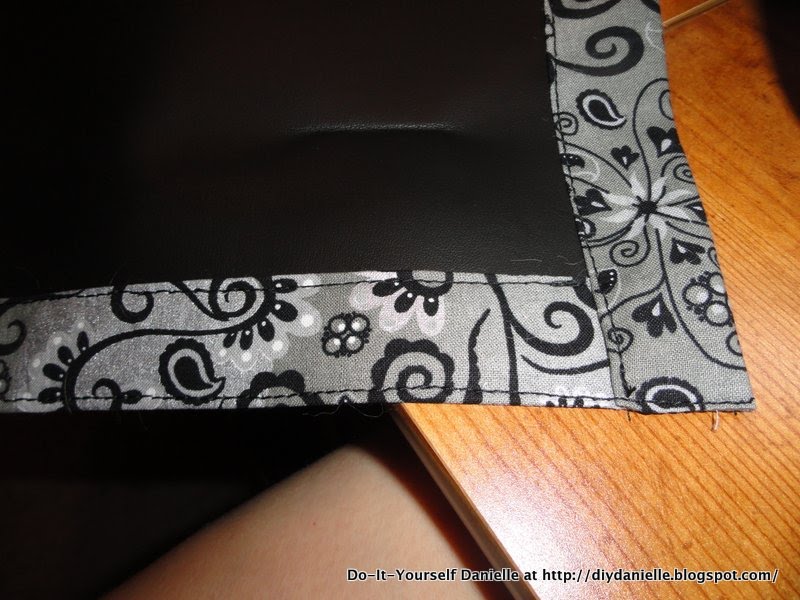 |
| I sewed a straight stitch right down each long side. Then I sewed on the inside of the fabric on the ends, as pictured. And I finished up with a straight stitch the entire width of the fabric on each end. |
Now you just need to take a lint brush to your project to remove all the dog hair from it if you have pets like I do! I noticed mine did have a few minor flaws that I’d try to fix next time. The main thing is just making sure that you pull each piece of fabric tight so that you don’t have areas where there’s extra fabric puckering. It’s not real obvious in my project, but it’s just something to think about if you make one yourself. The larger the table runner, the more difficult it is to do this successfully.
Now I just need to make equally awesome gifts for my mom and mother-in-law! And mail everything in time- that’s going to be the hard part!
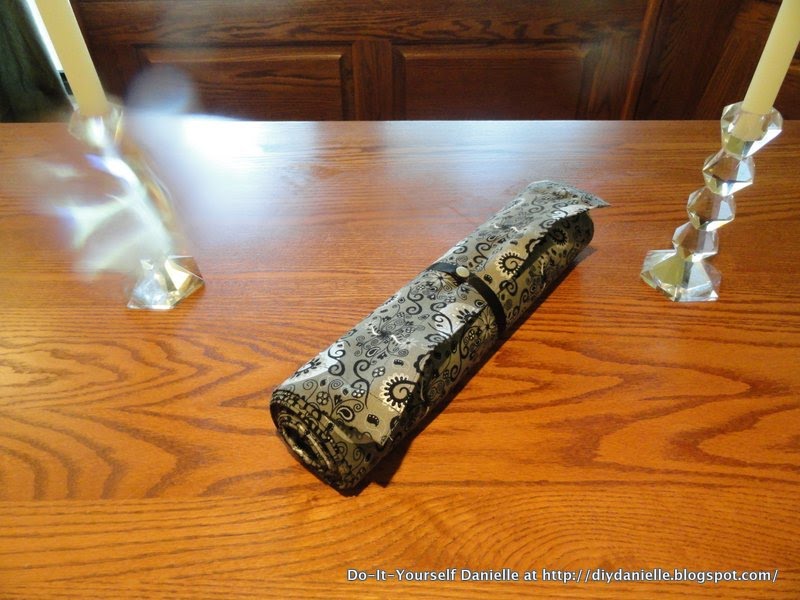 |
| I rolled mine up and used a piece of ribbon with some snaps to make a clip to hold it together once it’s rolled up. |
 |
| Chalkboard fabric facing up |
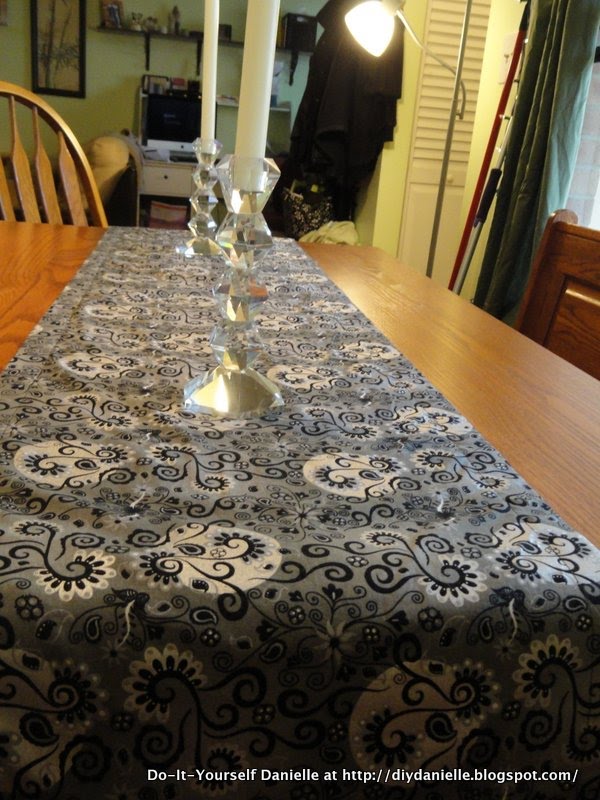 |
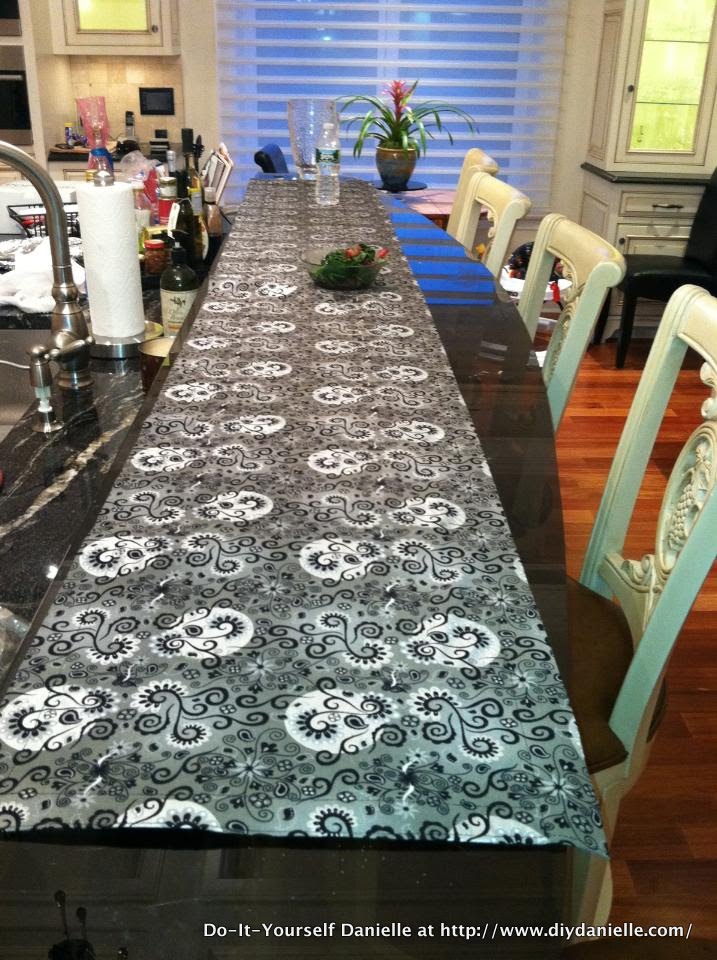
| I love this fabric. It looks great flipped over too if you want a more formal look. |
Care Instructions
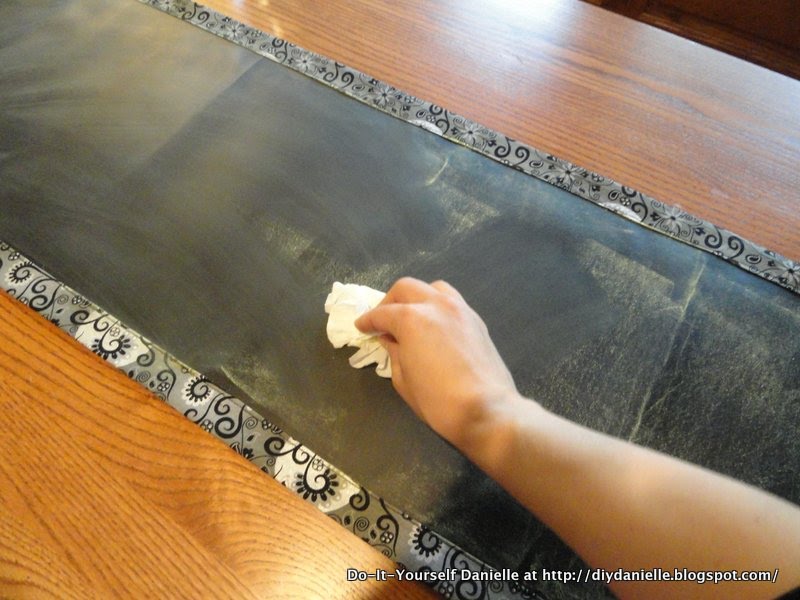
Prepping Your Table Runner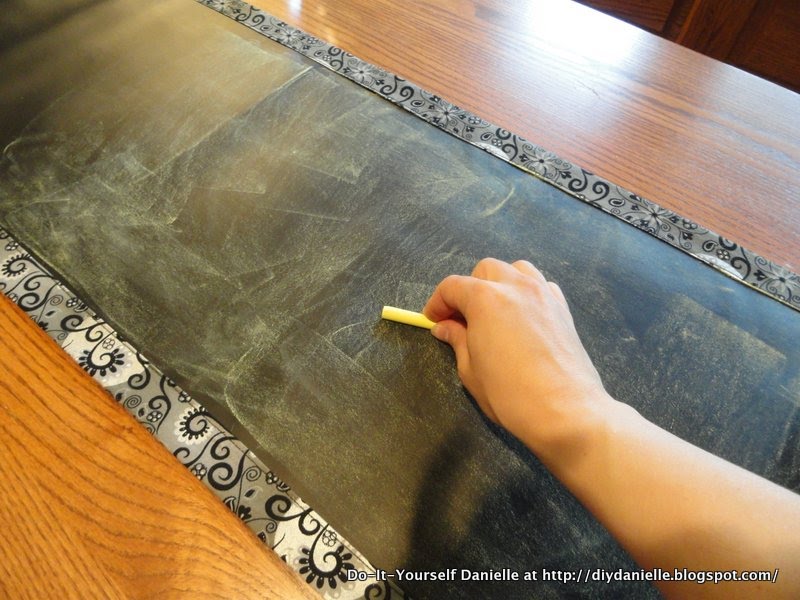
- Take a piece of chalk and rub it (the long way) all over the chalkboard surface.
- Take a piece of tissue or other cloth and just rub the chalk off.
- And now it’s ready to be used as a chalkboard… you can add descriptions of each dish that you’re serving, let the kids at the kids’ table all draw on it, or you can write a special message to your guests.
 |
| This is it, in action! |
DIYDanielle
Saturday 12th of May 2012
I'm glad it was helpful!
Neen
Saturday 12th of May 2012
I'm so glad I saw this, I made one for my mother in law. It's so cool! Thanks!! (-mommasteph2)